Welcome to Automator
Automate your Figma workflows
What is Automator?
Automator is a plugin or Figma that lets you create custom drag and drop automations that do time-sensitive Figma tasks for you in one click.
Now you can create custom Figma plugins visually without writing any code. Do everything from drawing shapes to making API requests to finding layers.
Examples
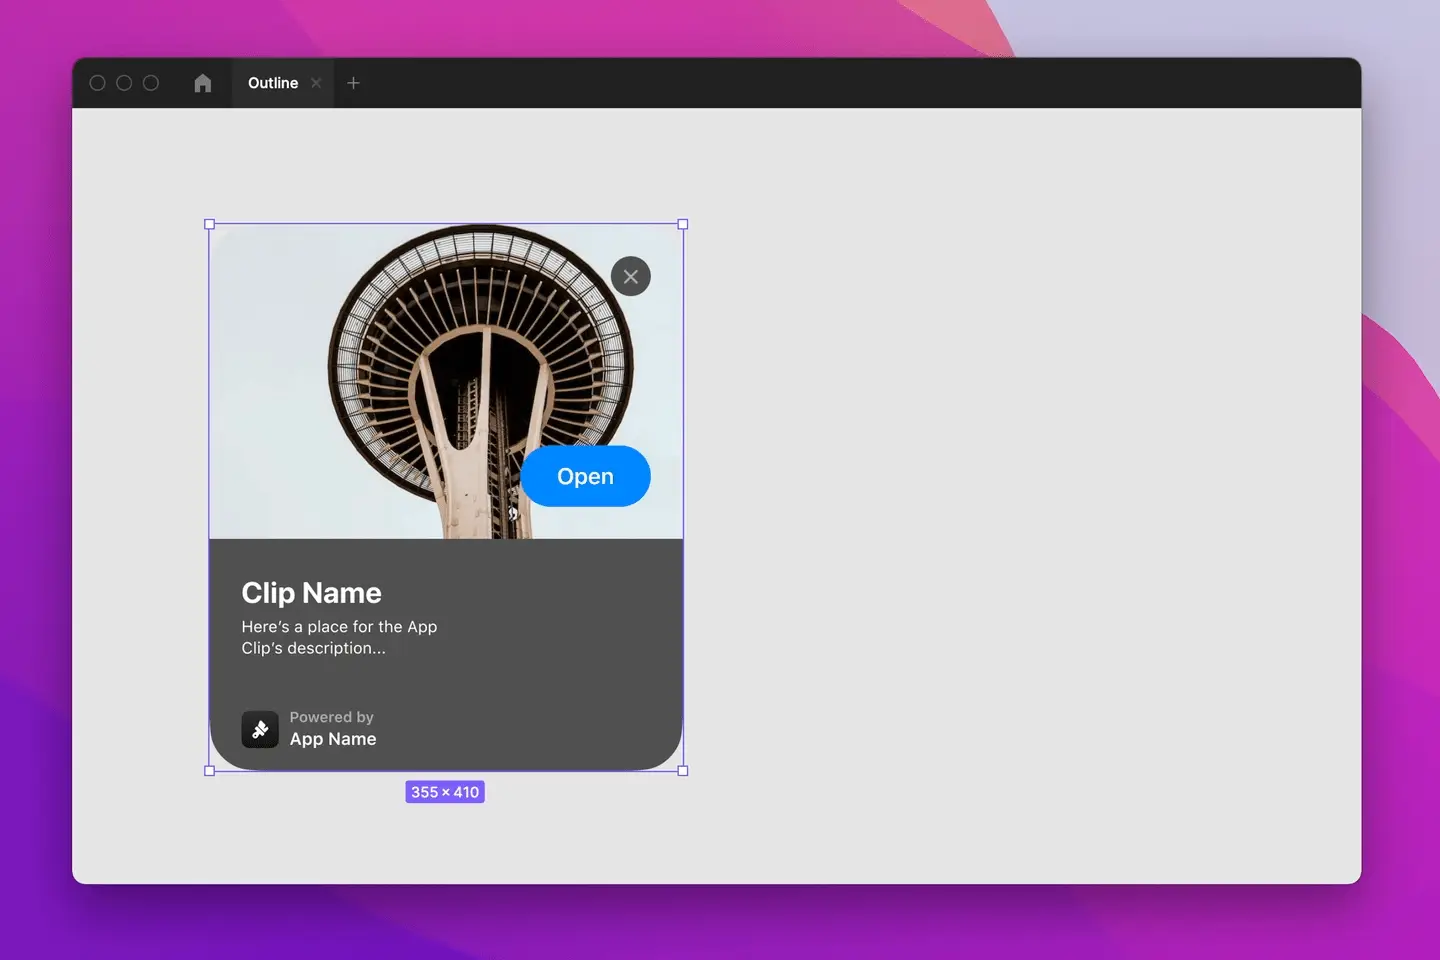 An automation to outline the spec of a design in Figma
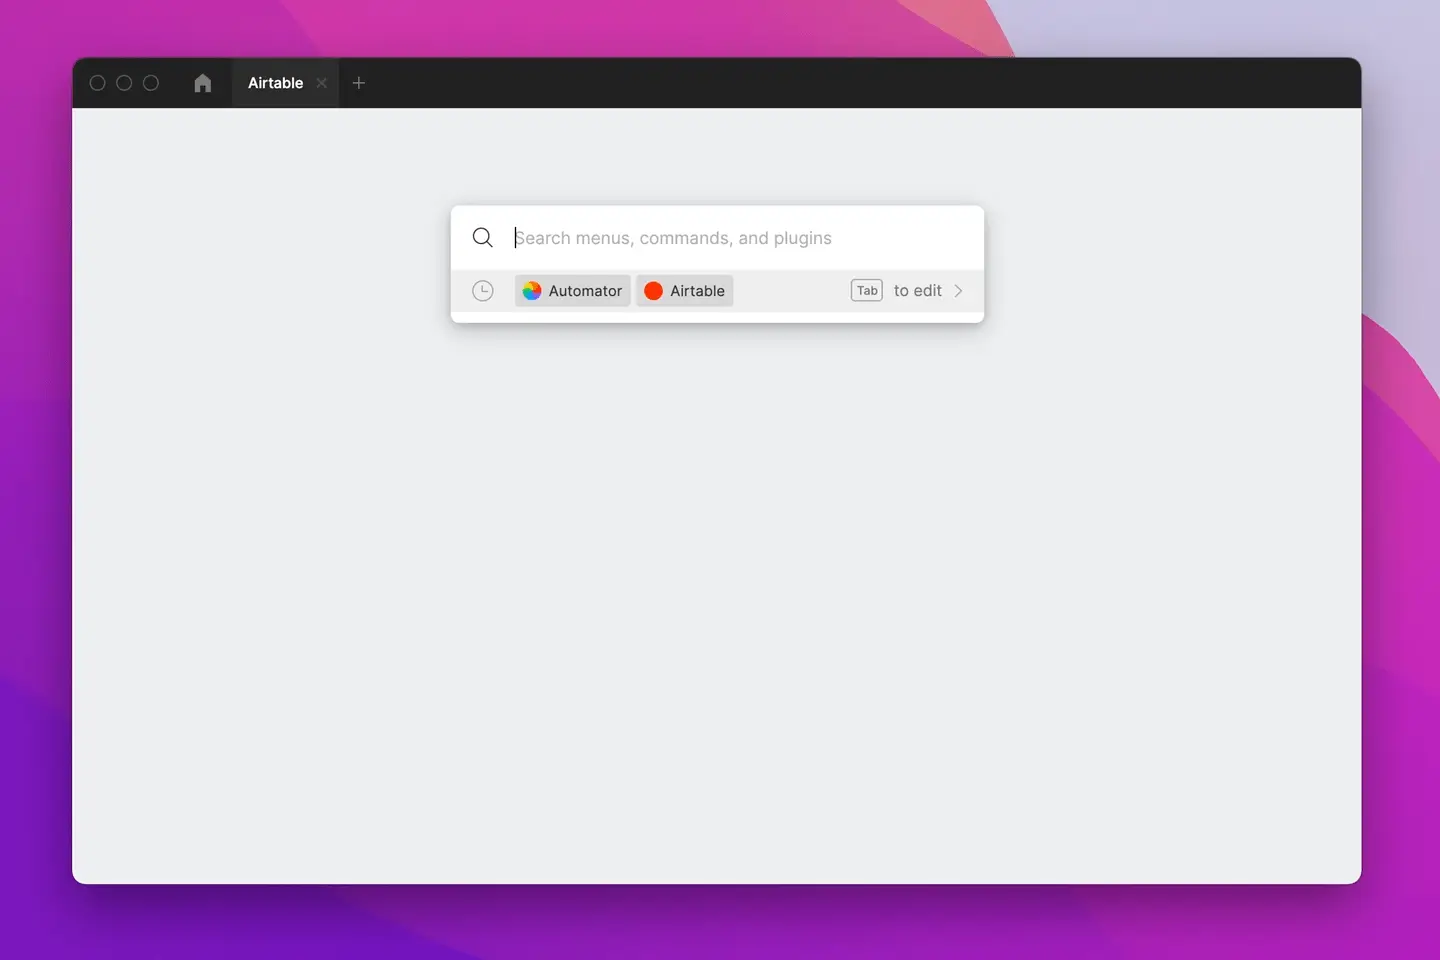 Automatically pull data from Airtable into Figma
 An automation that turns your selection into placeholder elements
Guides
Importing from Airtable into Figma
Getting started
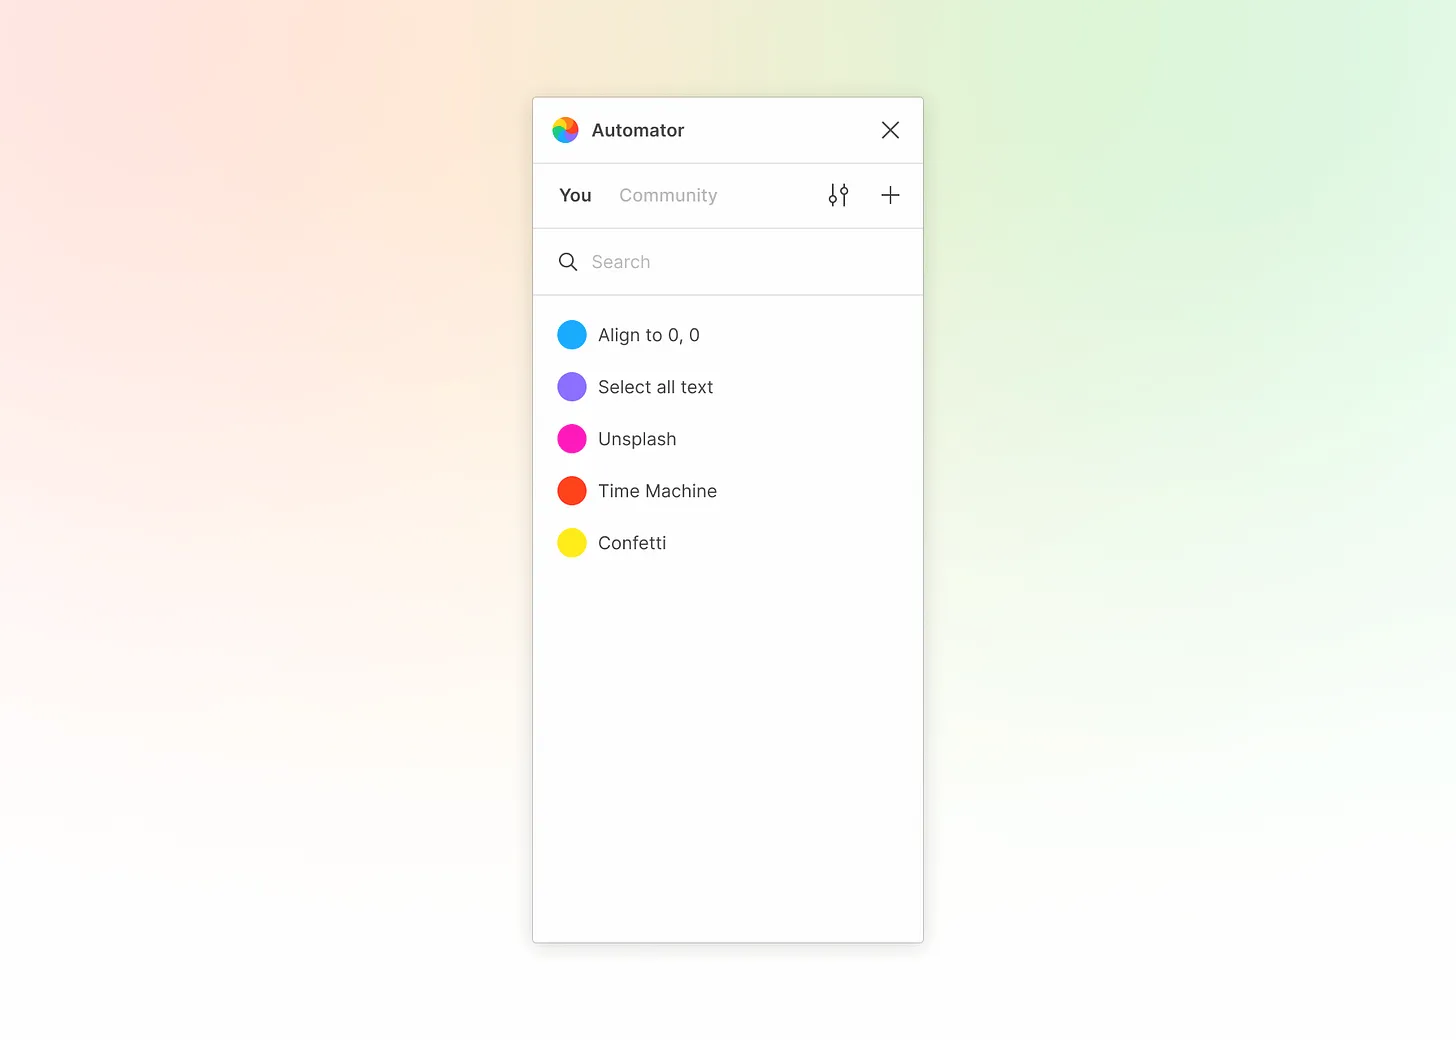
Explore the Automator Community
Automations
What are automations?
Automations are quick ways to get tasks done in Figma. For example, build an automation to find layers without color styles in your design system and apply the correct ones automatically.
They’re made up of multiple actions which are things you can do in Figma by mouse, keyboard, or menu.
Creating an automation
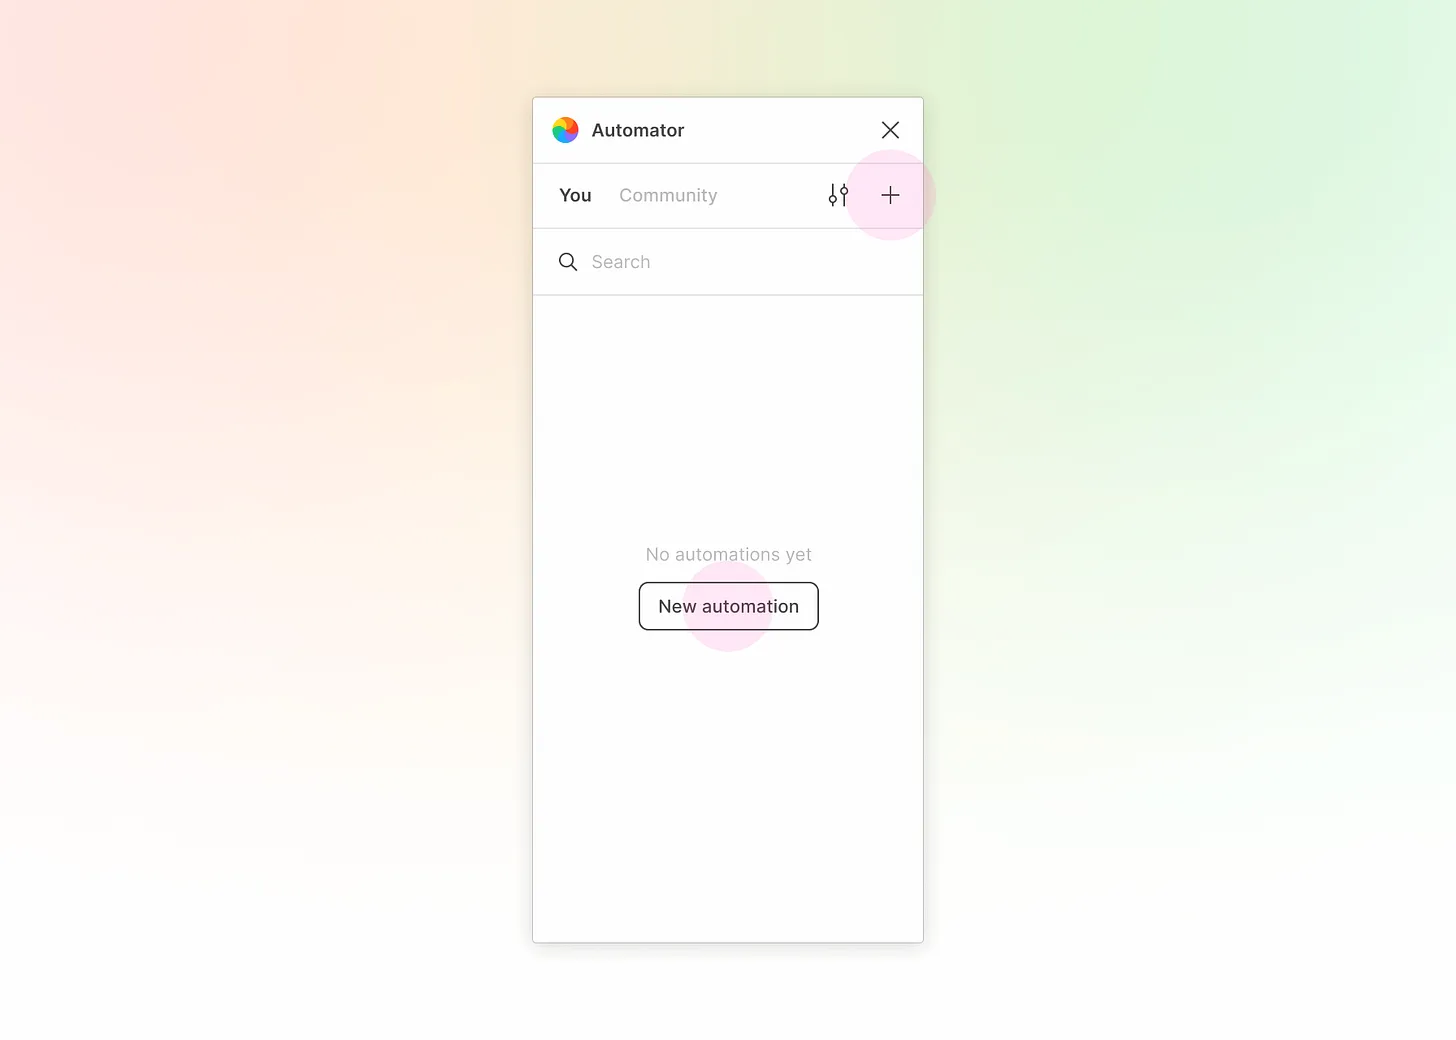
Create an automation by pressing the “+” icon in the top right, or by pressing “New automation” from home.
Each automation that you create is automatically saved.
New automations
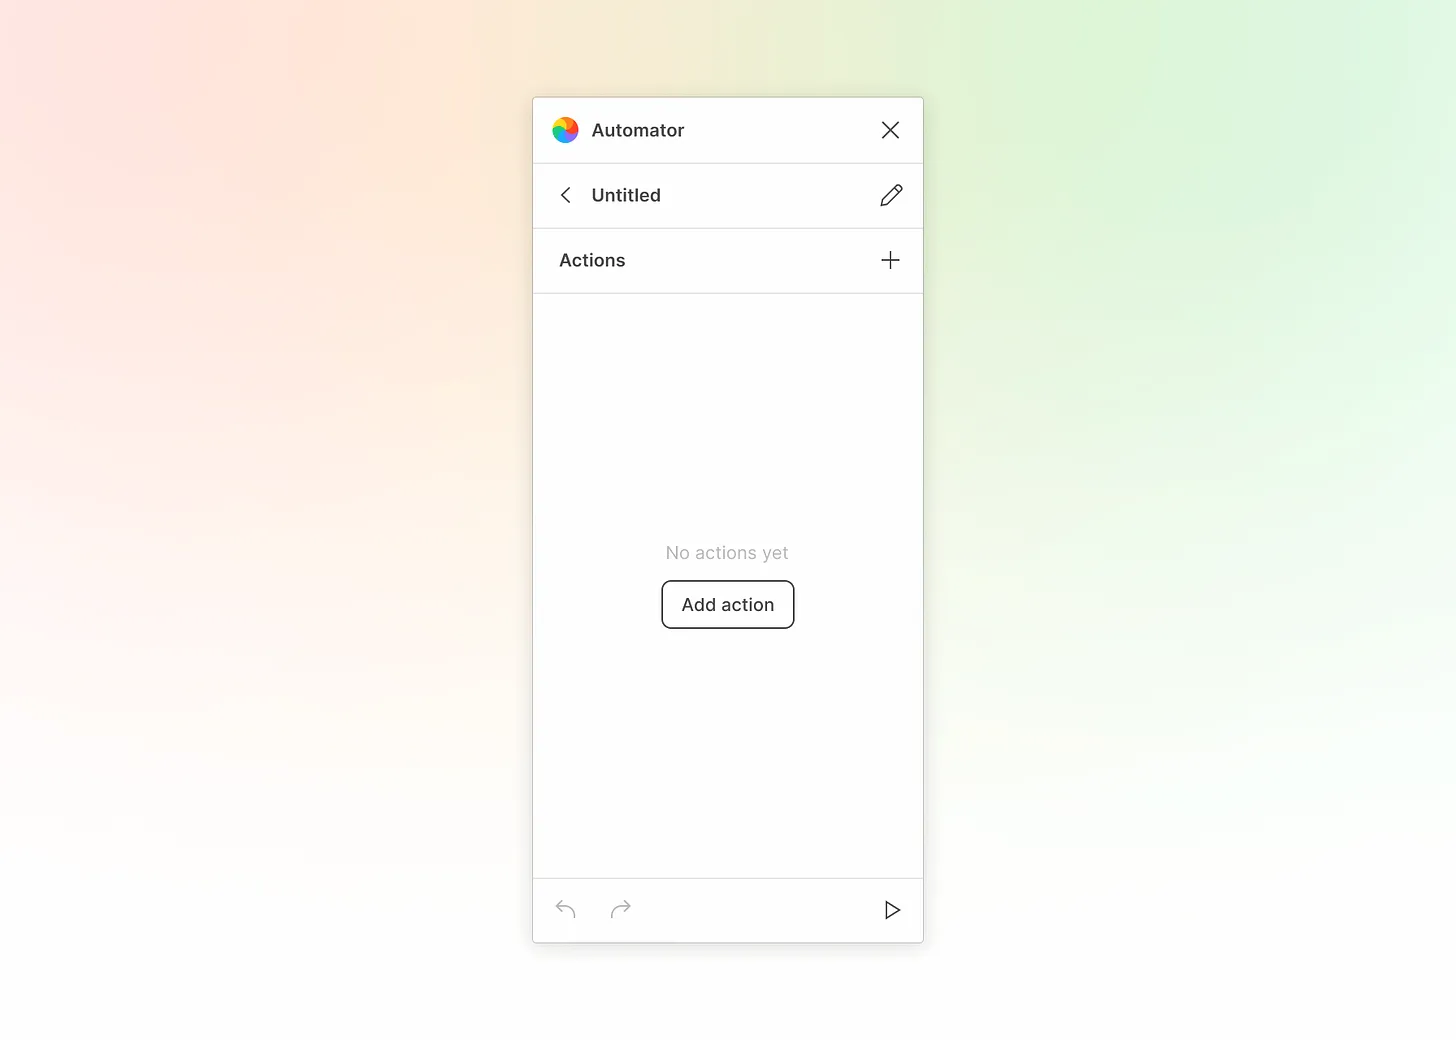
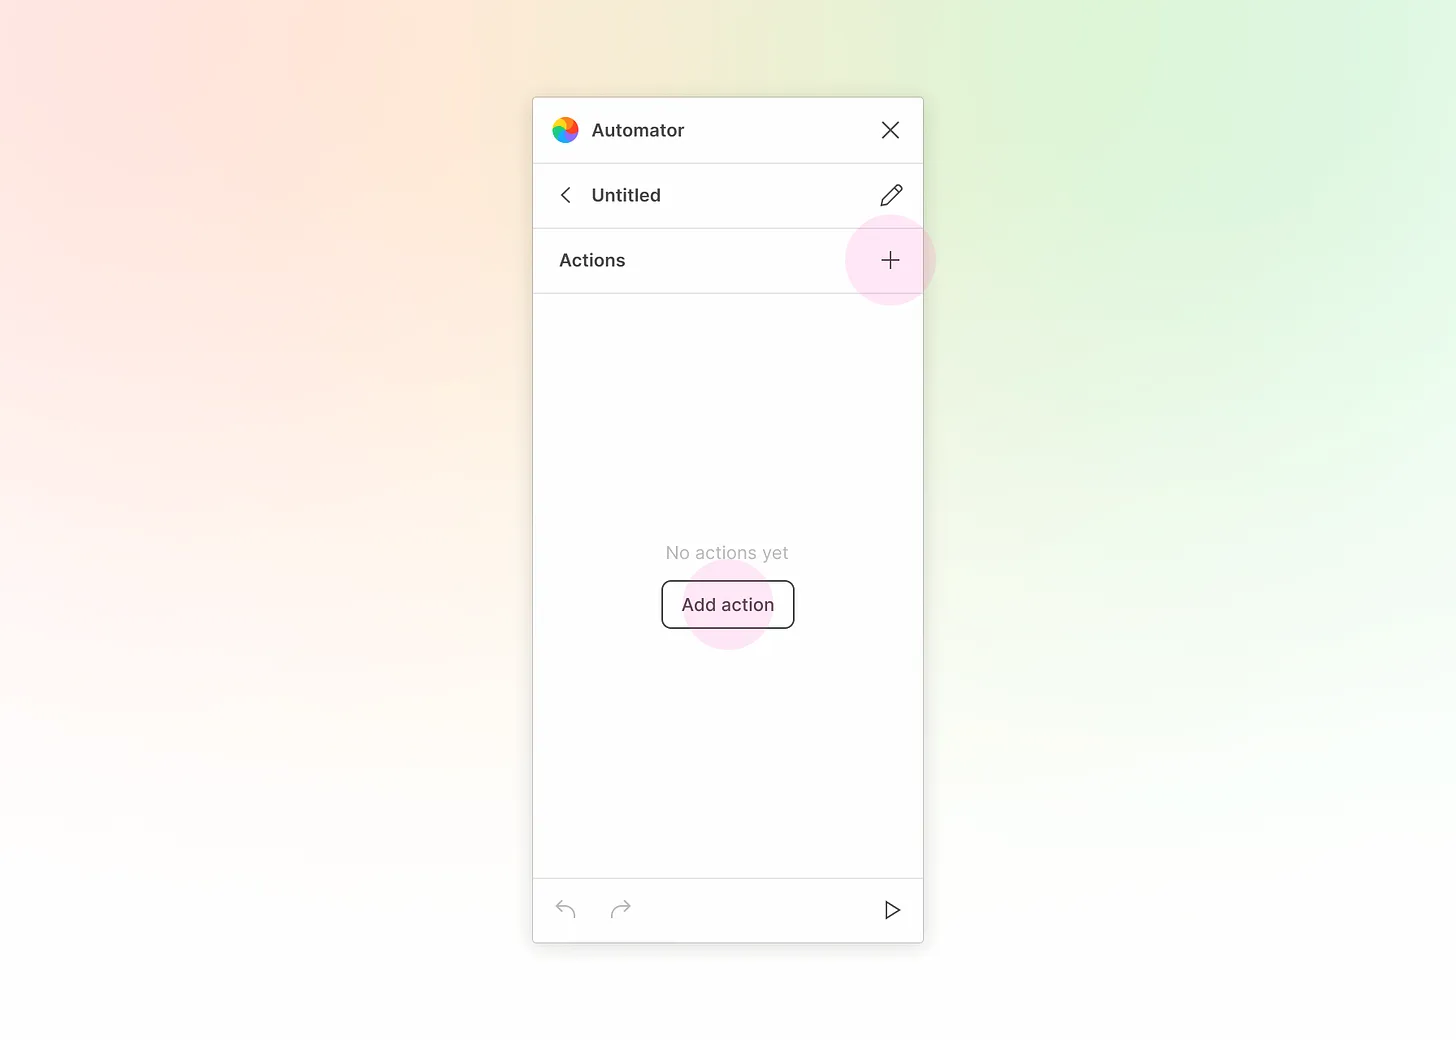
By default, you’ll create a new automation called “Untitled”.
Edit an automation’s settings by pressing the pencil icon in the top right.
Add an action by pressing the “+” icon, or by pressing “Add action”. Learn more about actions.
Running an automation
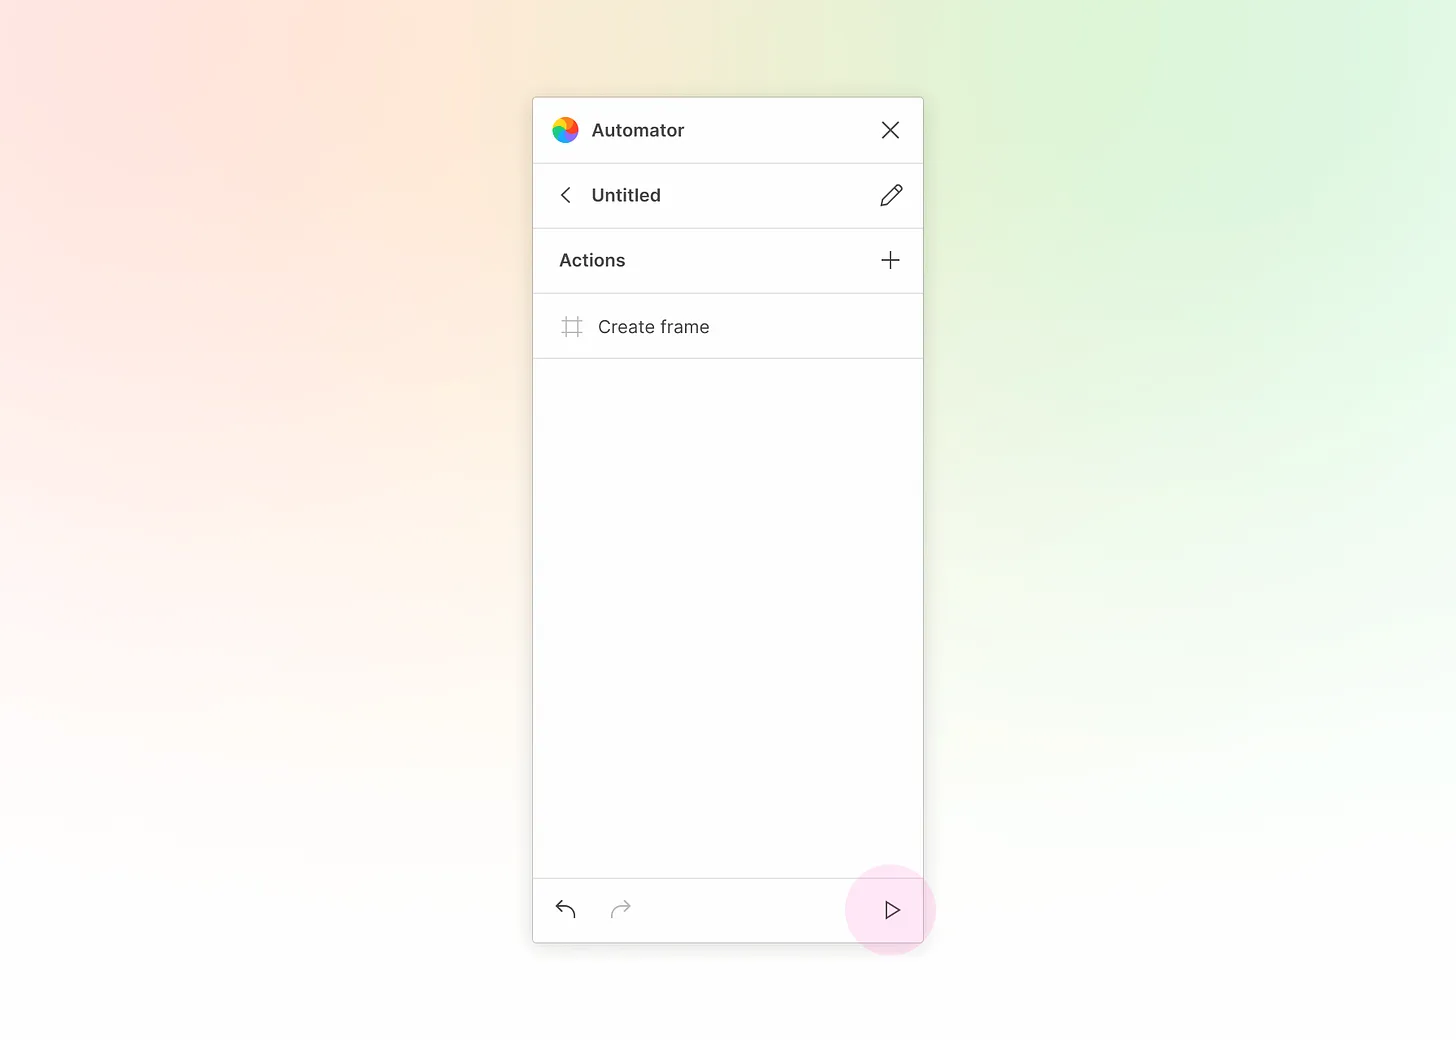
Press the play button in the bottom right to run an automation.
For active automations, the play button will turn into a stop button that will stop the automation entirely.
Automation settings
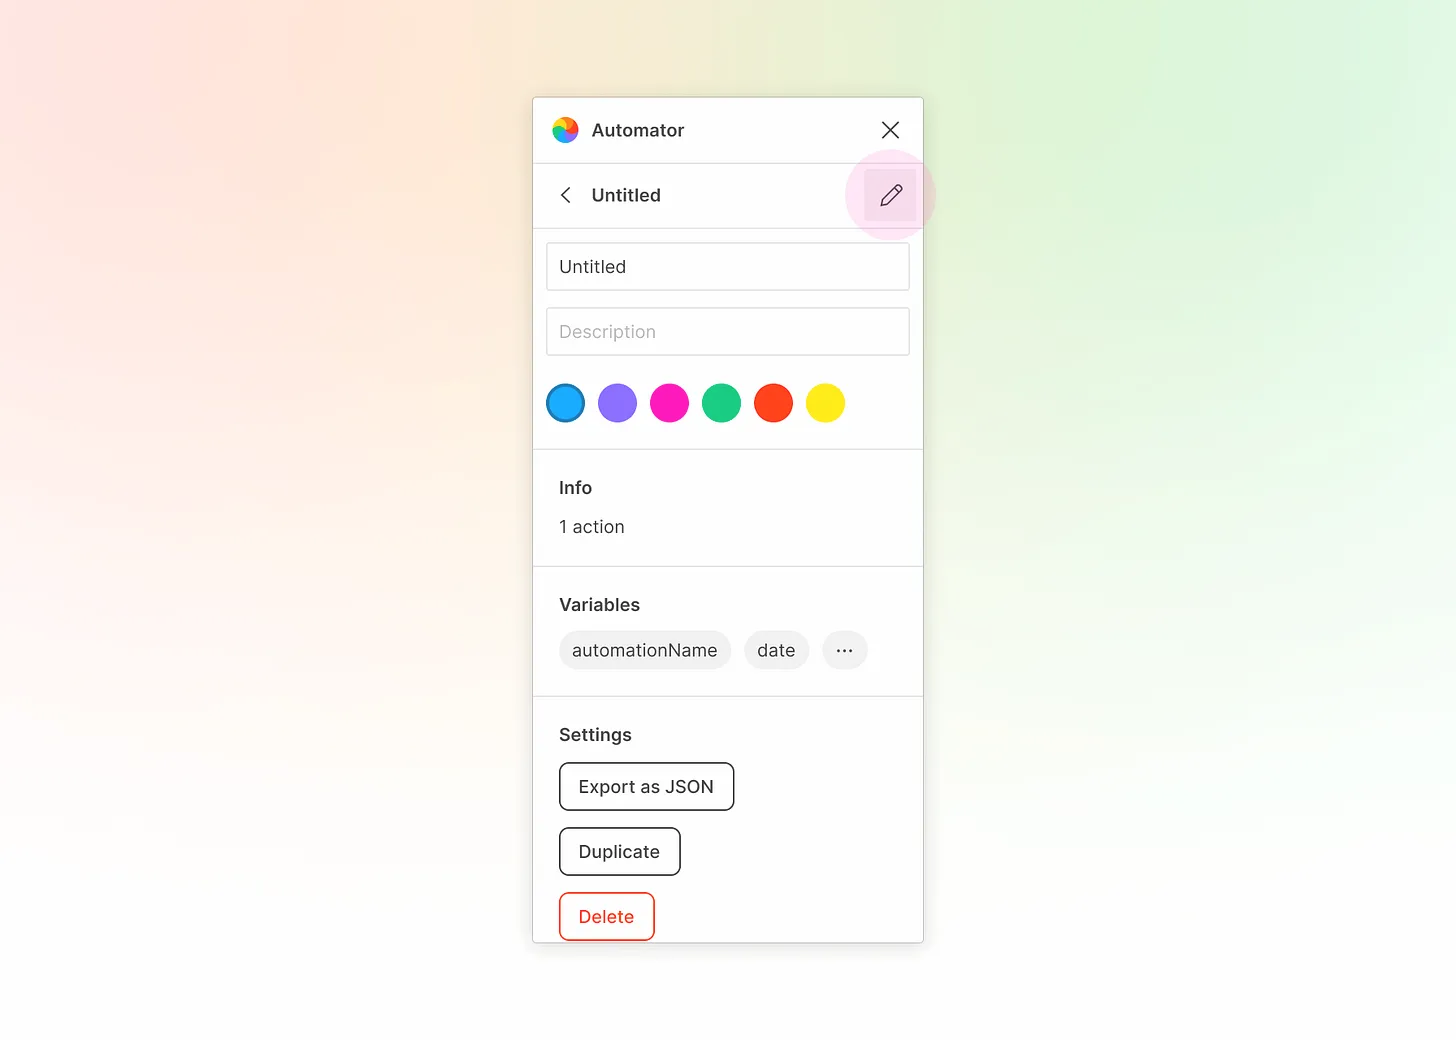
Press the pencil icon in the top right to edit an automation’s settings.
Give the automation a title or optional description for your reference. Choose a color that will appear in the list of automations.
You can see which global variables the automation has access to under “Variables”. Learn more about variables.
You can also export the automation as JSON to share it with others, duplicate the automation, or delete the automation entirely.
Actions
View the documentation for all actions available in Automator here.
What are actions?
Actions in Automator are things you can do in Figma by mouse, keyboard, or menu.
Piece them together to automate workflows for you and your team.
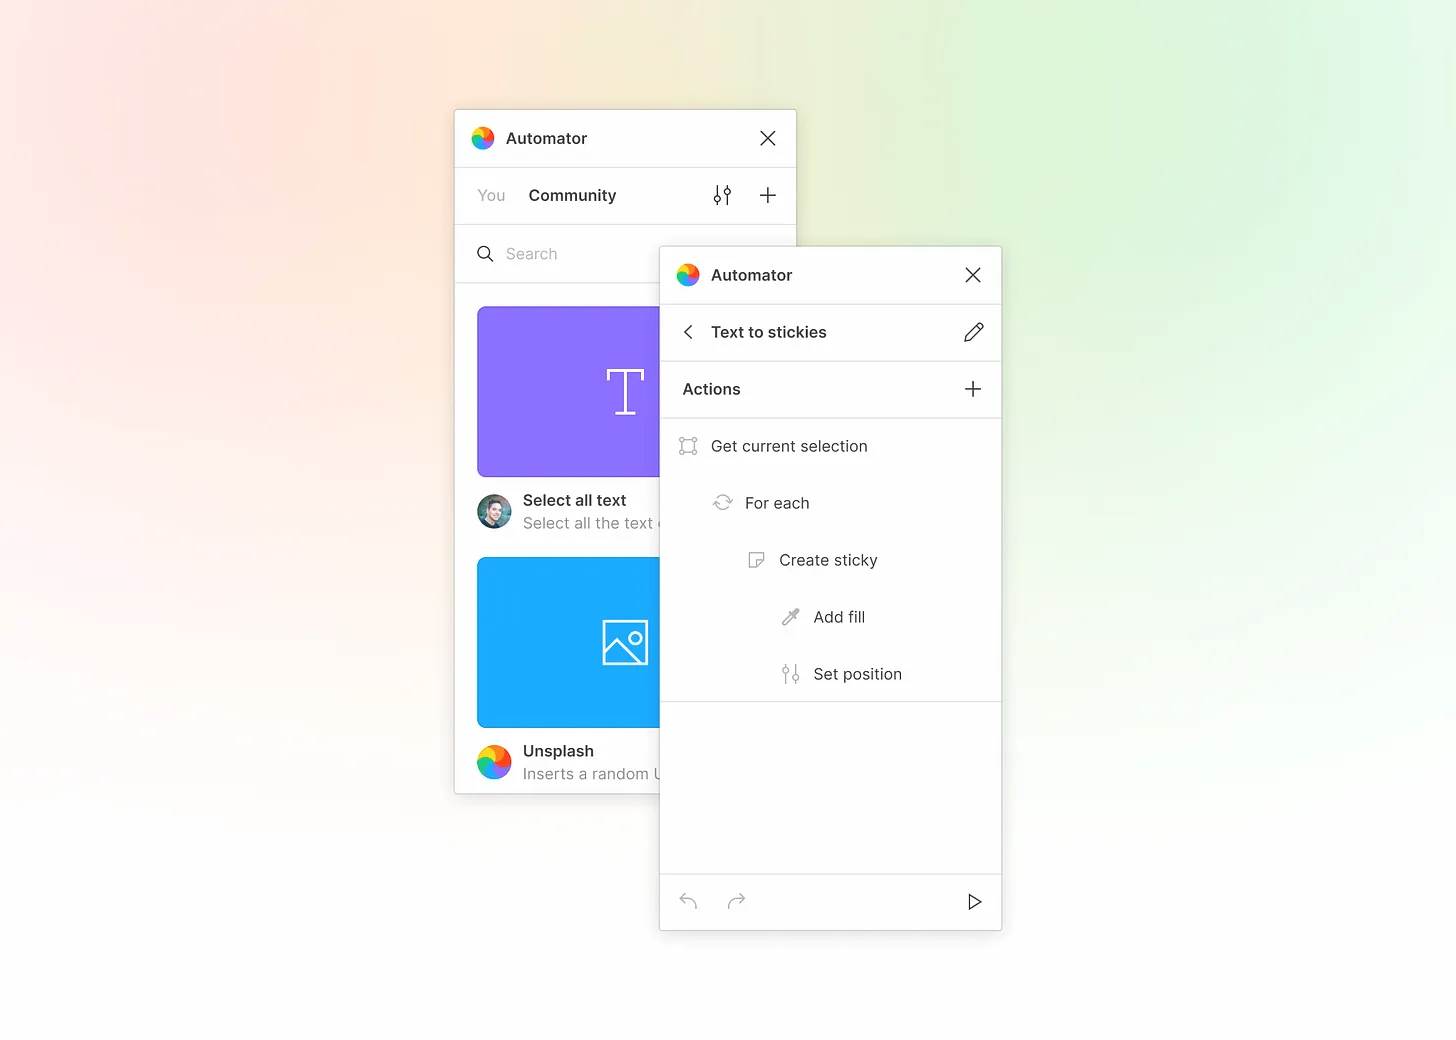
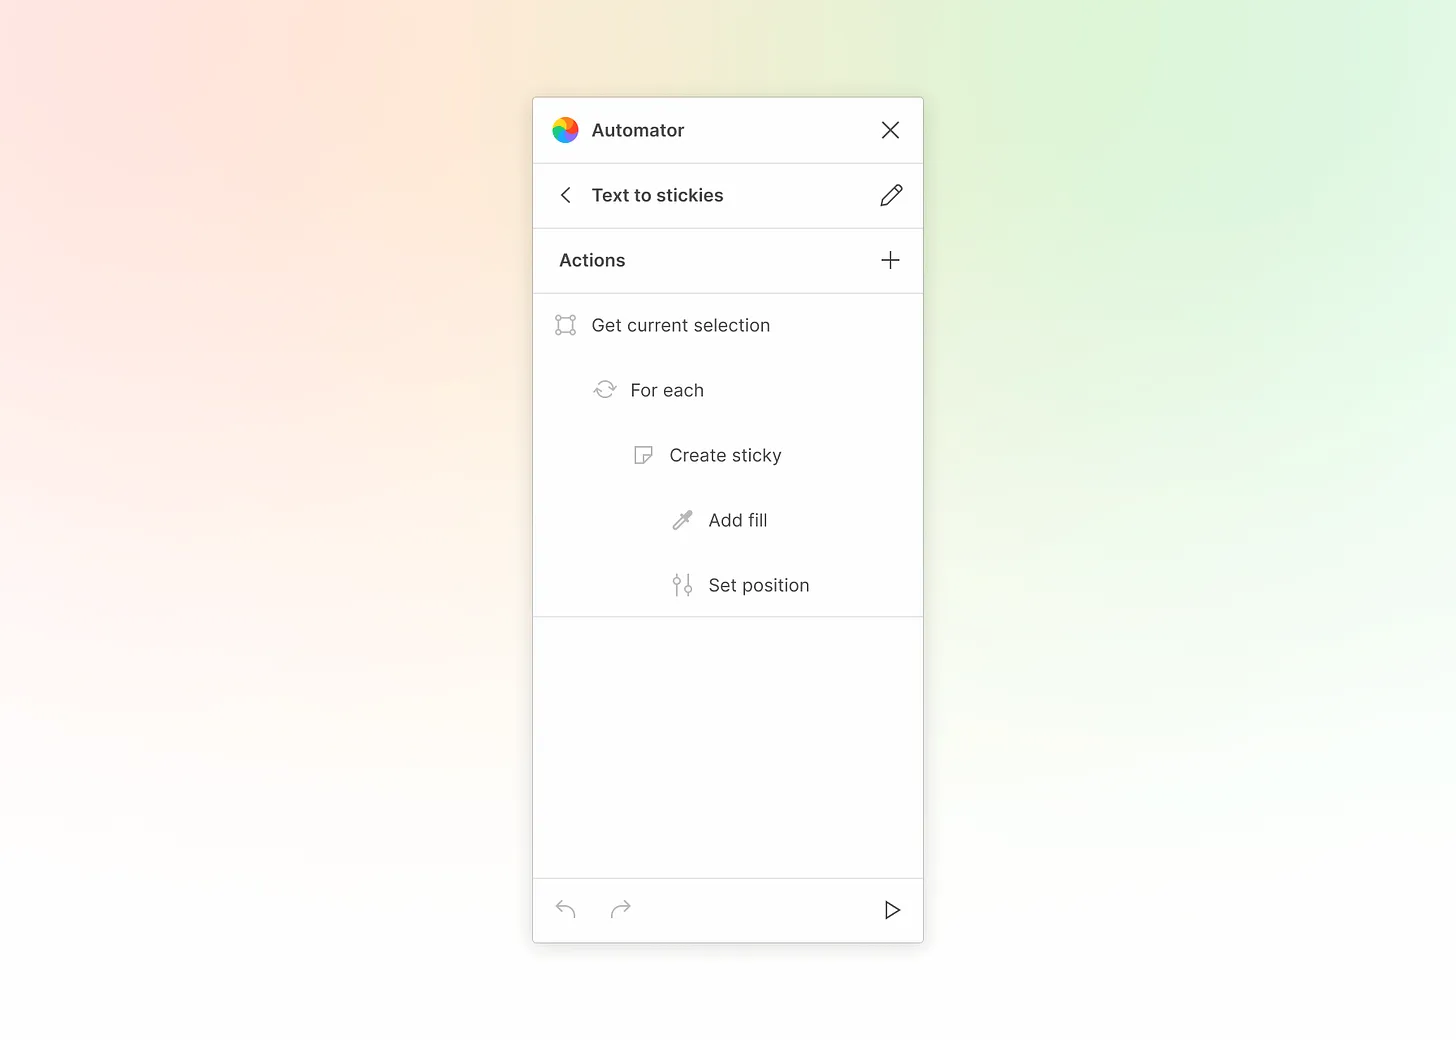
For example, the automation above turns your currently selected text layers into stickies in FigJam.
Adding an action
Add an action by pressing the “+” icon, or by pressing “Add action”.
Choosing an action
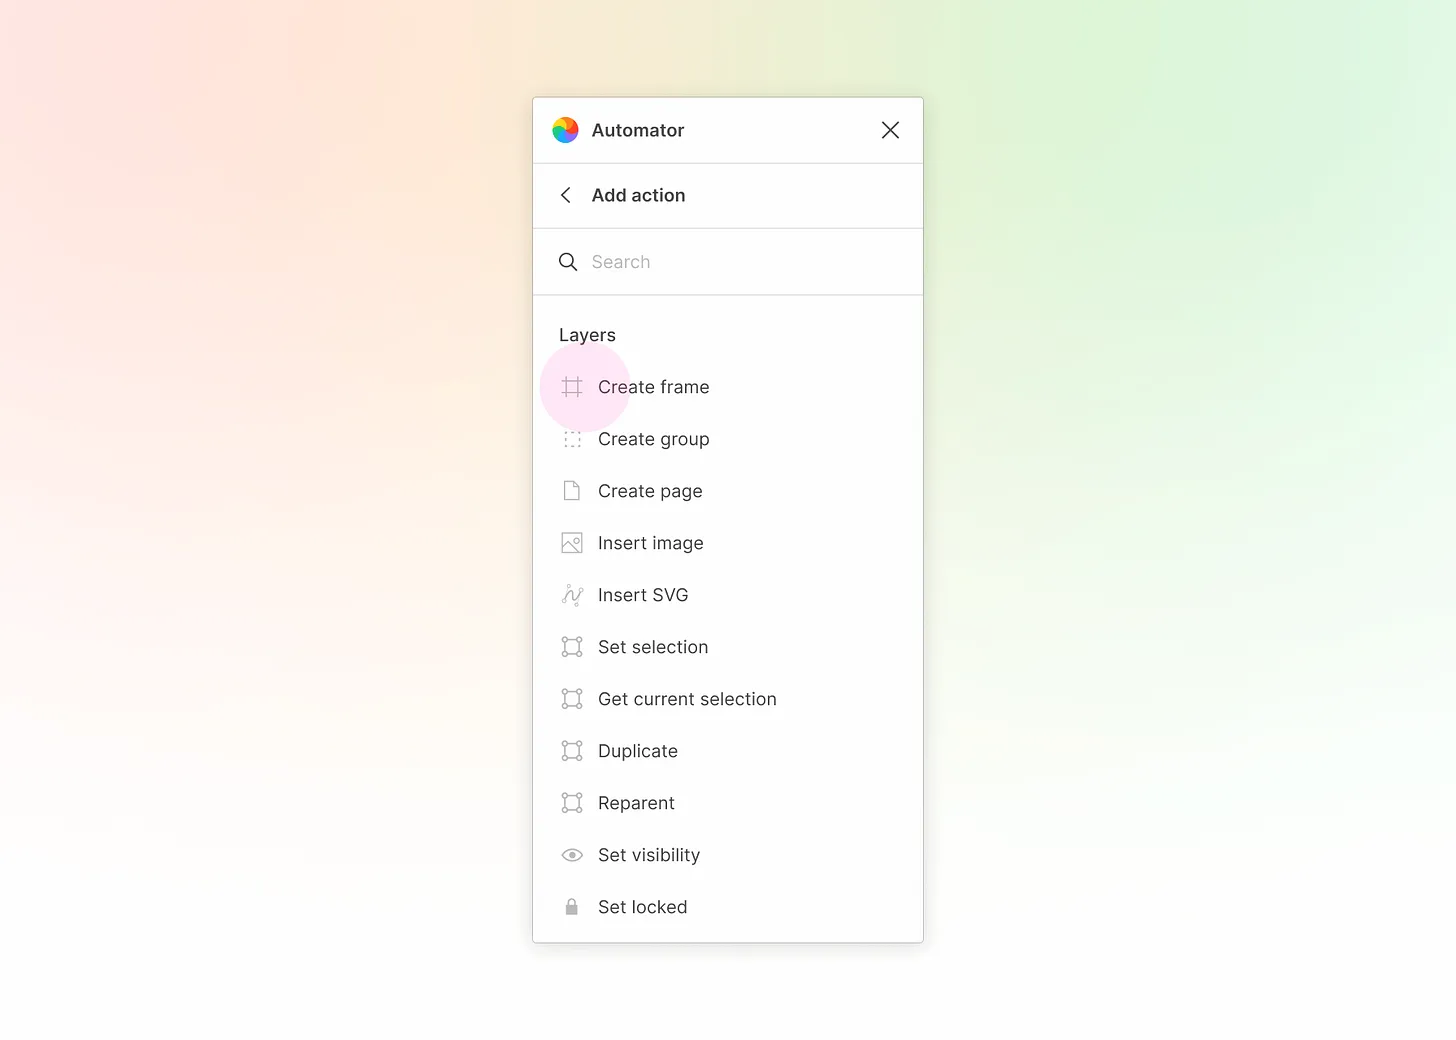
You can think of actions as things you can do in Figma by mouse, keyboard, or menu.
Do everything from drawing shapes to making API requests to finding layers.
Hover over an action in the list to get more details on what it does.
After choosing an action
The action you chose will be inserted at the bottom of the list of existing actions.
Try adding the “Create frame” action and pressing “run” in the bottom right.
Editing an action
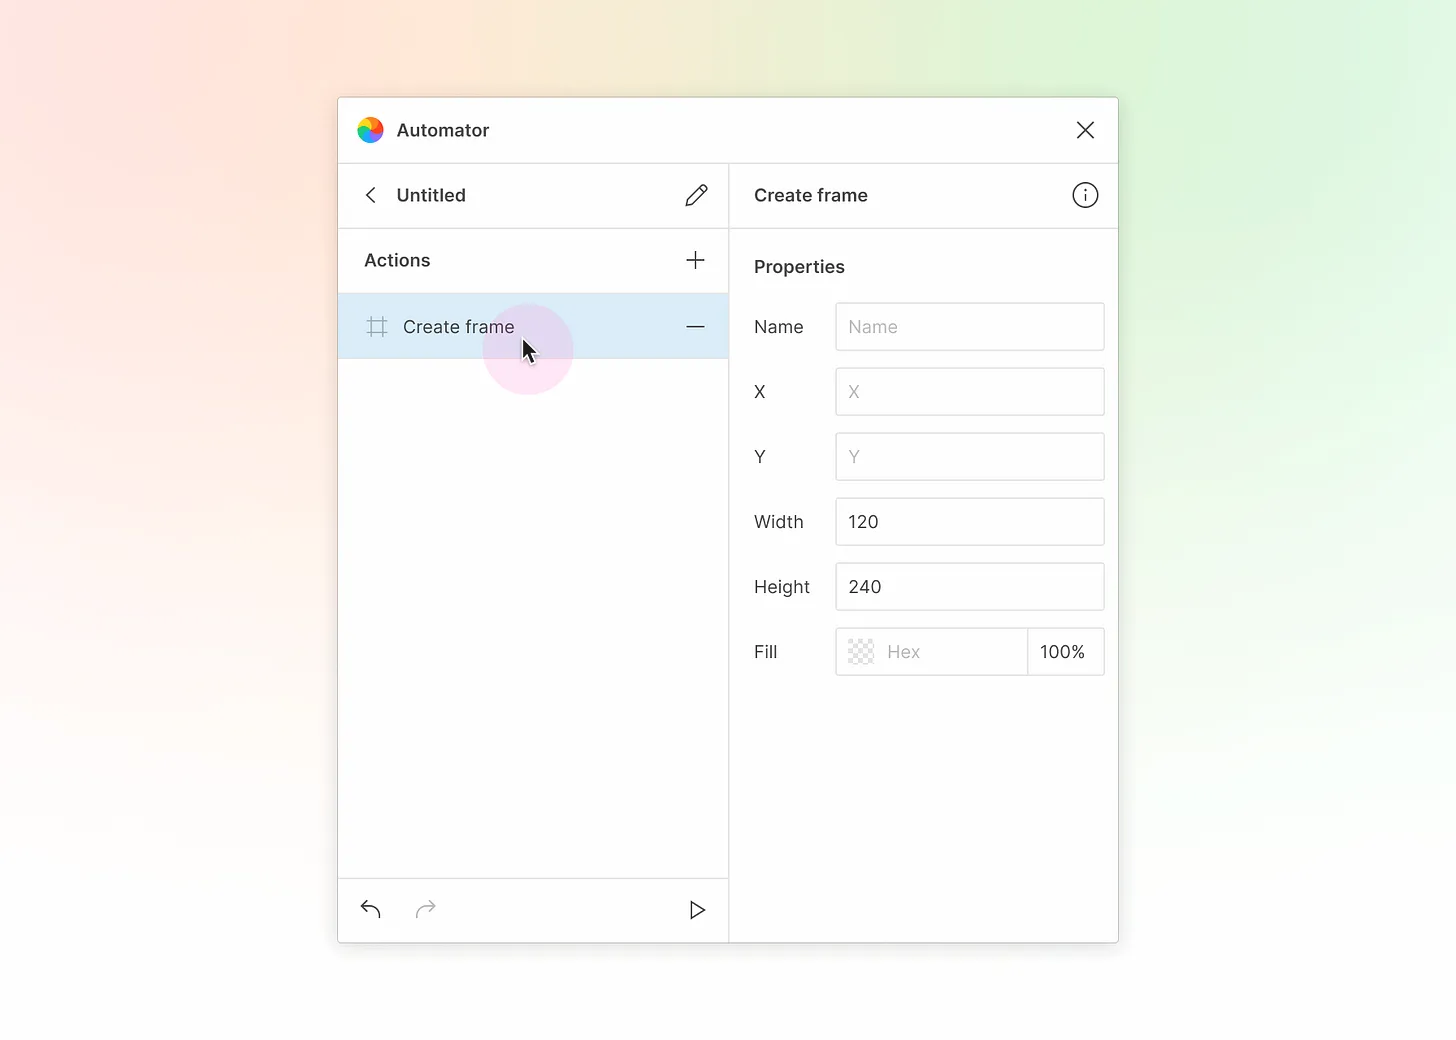
Click on an action to edit its properties.
Each action comes with a set of default properties. Some actions have no properties.
Try setting a custom width and height on the “Create frame” action.
Nesting actions
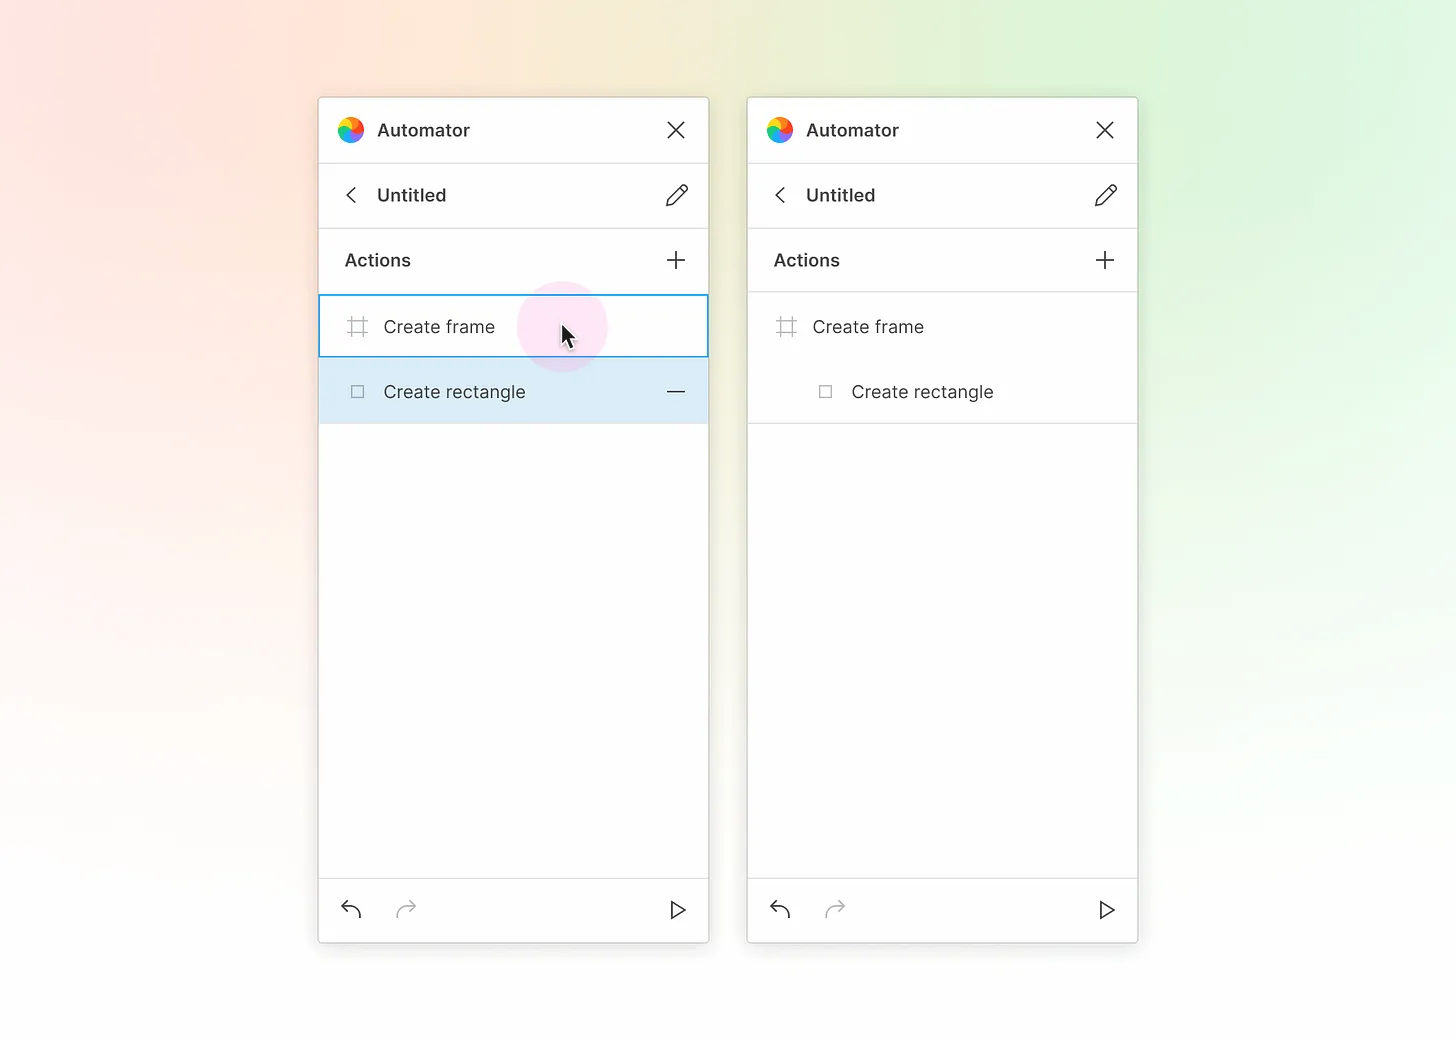
Similar to the layers panel in Figma, actions can be nested inside of one another.
Simply drag an action inside another to nest.
Try nesting a rectangle inside of a frame by adding the “Create rectangle” action and dragging it inside of the “Create frame” action.
Nested actions will appear inset underneath their parent actions.
An example nested action
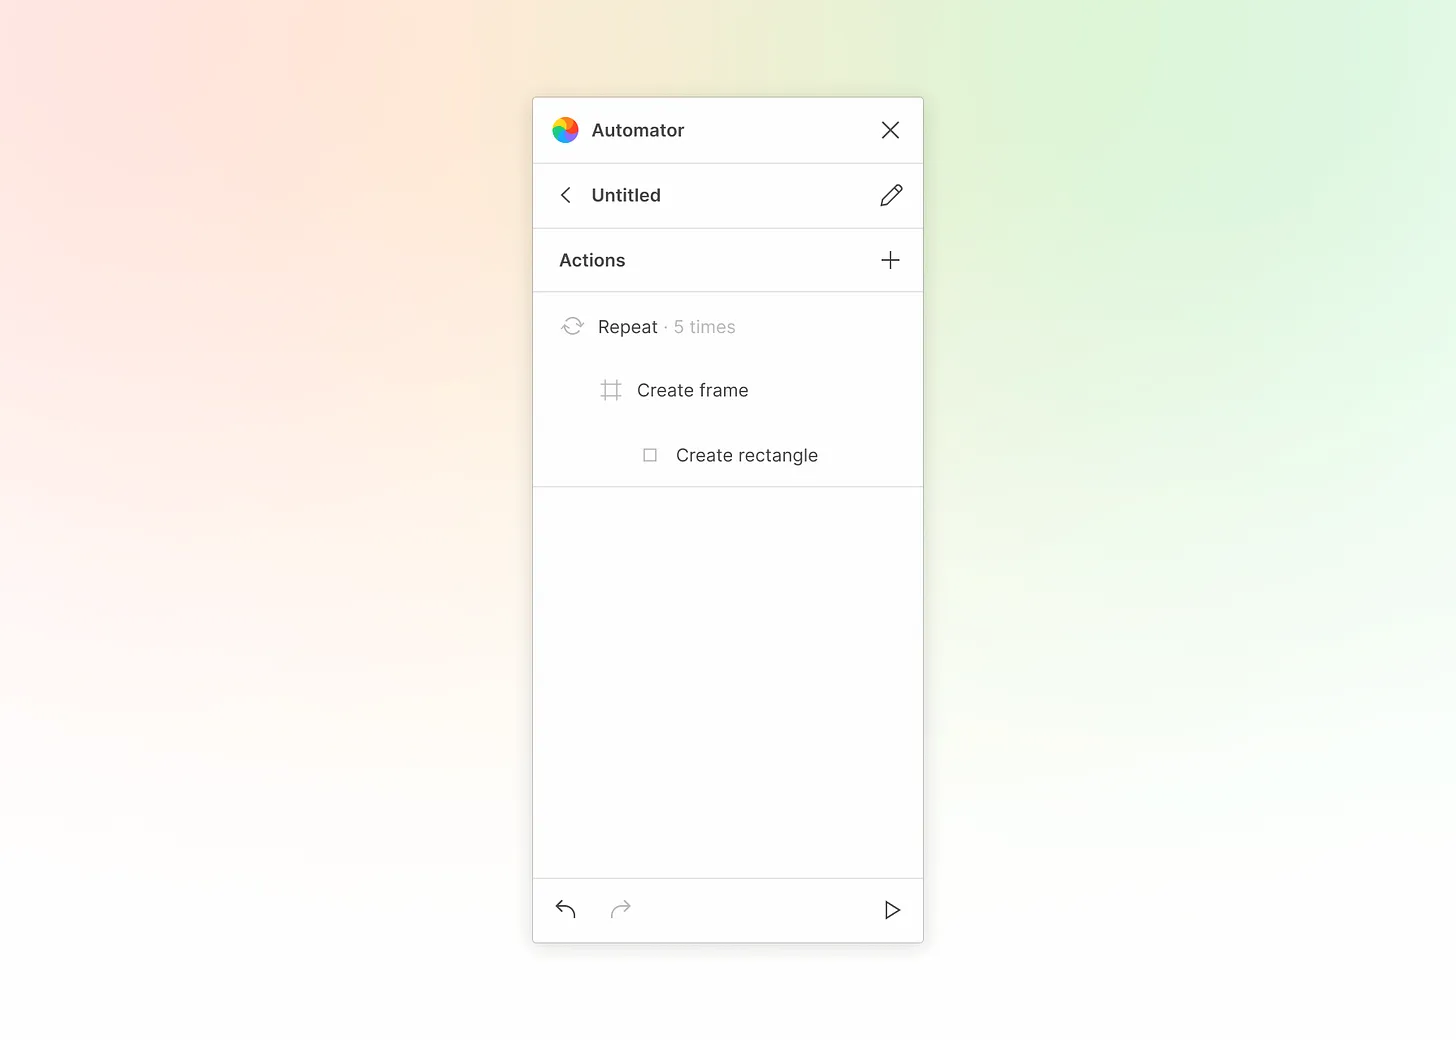
The “Repeat” action is a great example of an action that relies on nesting.
Whatever is nested inside of it will repeat a specified number of times.
Try recreating the example above that repeats creating a frame with a rectangle inside of it 5 times.
When to nest
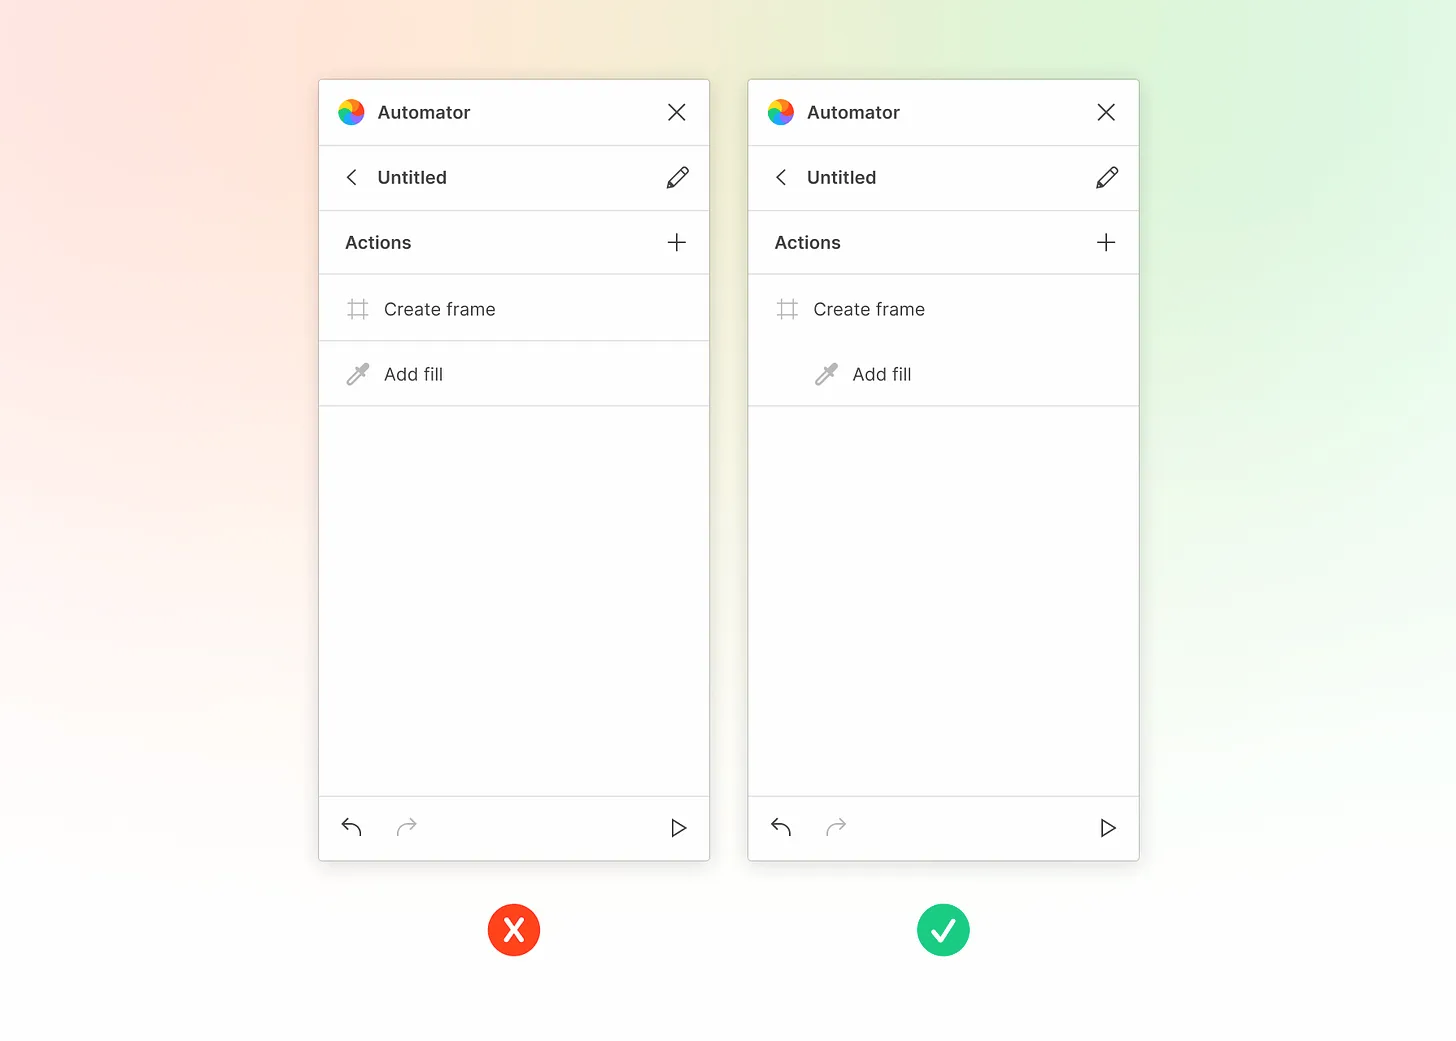
Let’s say we want to create a frame and add a fill color.
Left (incorrect): “Create frame” and “Add fill” are running entirely independent of one another. “Add fill” needs to be nested to know what layer to set a fill on.
Right (correct): “Add fill” is being executed on the result of the “Create frame” action.
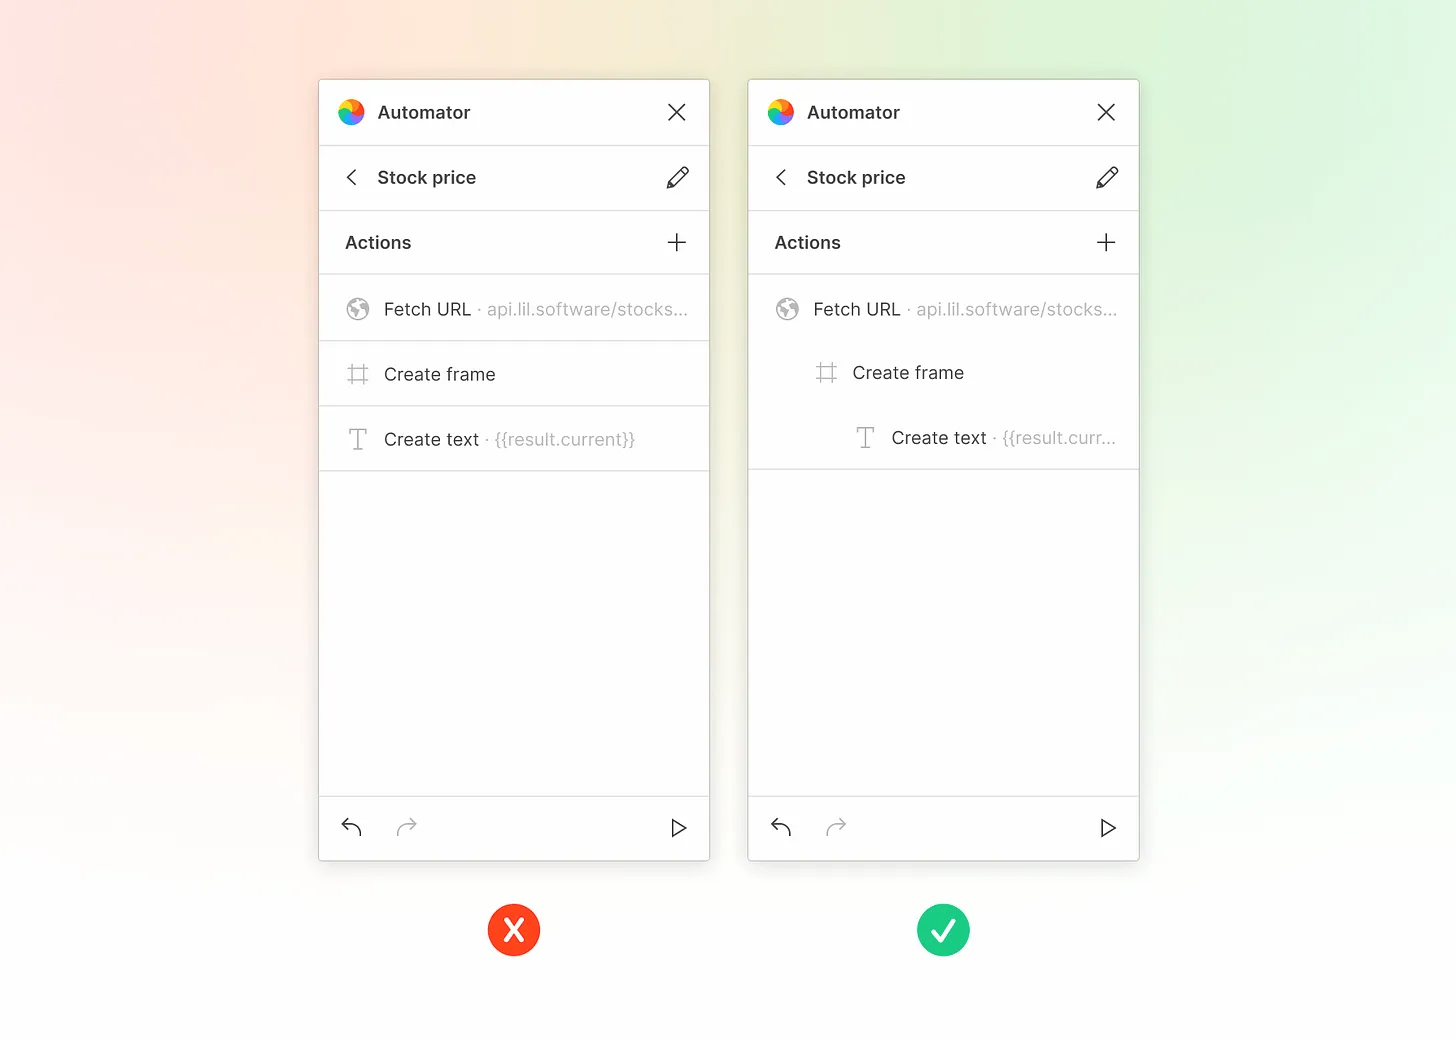
Here’s an example where we’re fetching a URL from an API and creating a frame with the result as text inside of it.
Left (incorrect): “Fetch URL,” “Create frame,” and “Create text” are running entirely independent of one another. This will create a frame and an undefined text layer separate from one another.
Right (correct): “Fetch URL” runs the actions inside of it once the request is completed. Only then does it create a frame with the result as text inside of it.
Additional action info
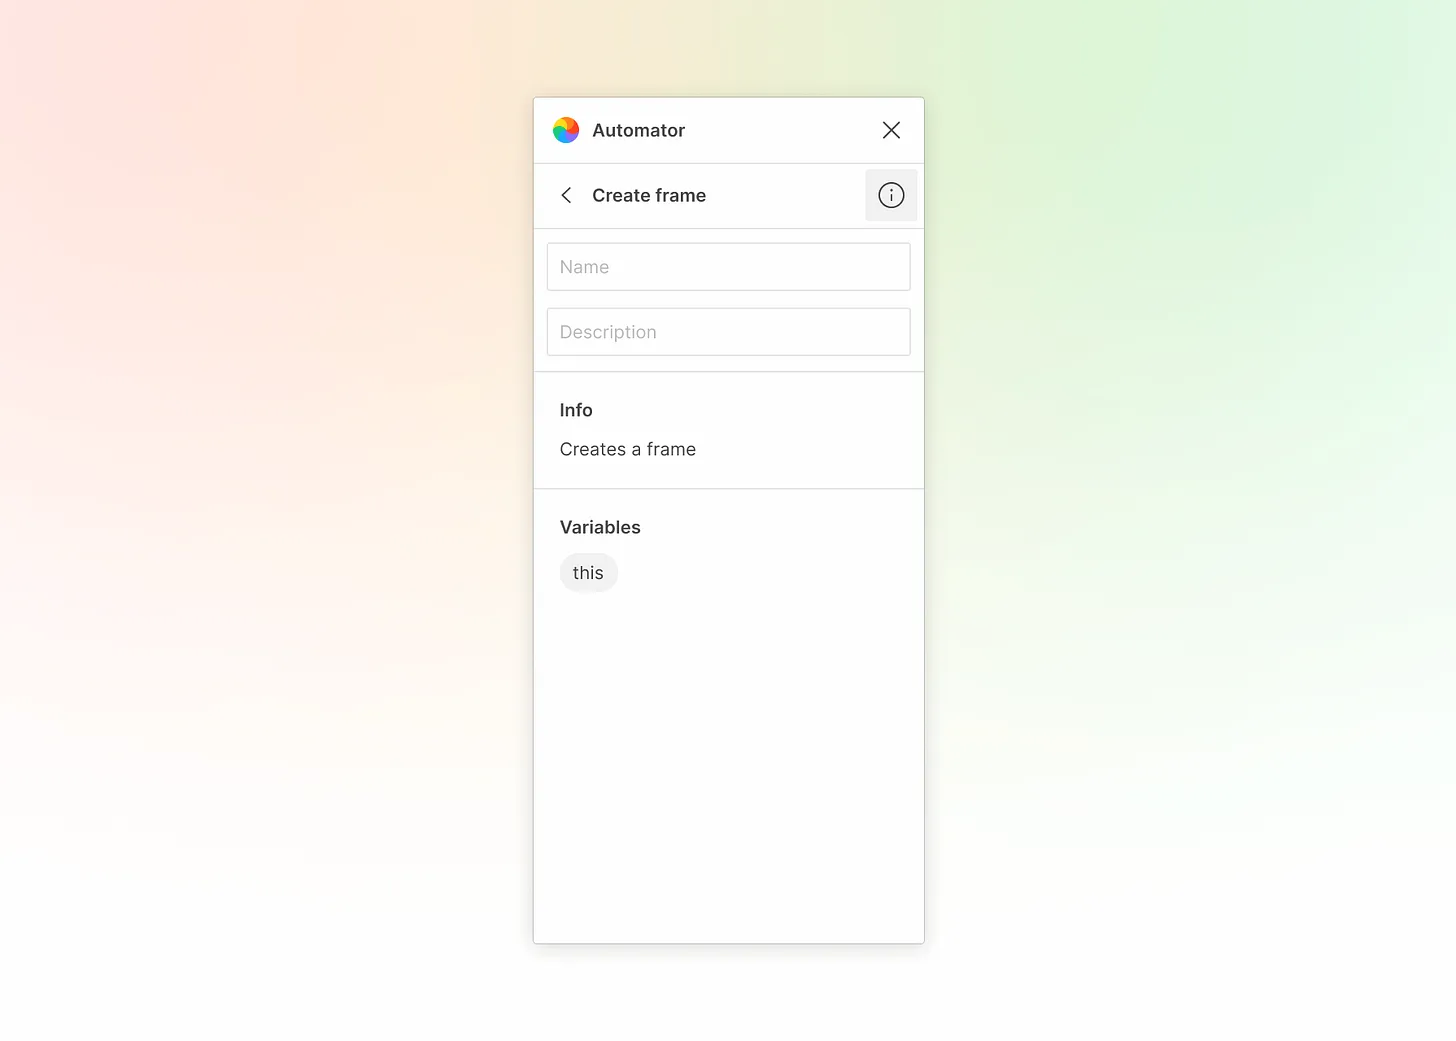
Press the info icon in the top right while editing an action’s properties to get more information.
You can optionally rename the display name that appears in the list of actions or add a description to describe the purpose of the action for your reference.
You’ll find more about how the action works under “Info”.
You can see which variables the action has access to under “Variables”. Learn more about variables.
Below is a list of all actions available in Automator:
Layers
- Create frame
- Create group
- Create page
- Insert image
- Insert SVG
- Set selection
- Get current selection
- Group selection
- Frame selection
- Ungroup
- Duplicate
- Reparent
- Set visibility
- Set locked
- Delete layer
- Set mask
- Set clips content
- Flip horizontal
- Flip vertical
- Move to page
- Bring to front
- Send to back
- Resize to fit
- Flatten
- Boolean group
- Add to selection
- Remove from selection
- Place inside group
- Place inside frame
Components
- Convert to component
- Insert instance
- Swap instance
- Detach instance
- Create empty component
- Combine as variants
- Set component property
- Set component description
Team Library
Shapes
Text
- Create text
- Set text
- Set font name
- Set font size
- Set line height
- Set letter spacing
- Set text alignment
- Set text case
- Set text decoration
- Set text resize
Properties
- Set layer name
- Add fill
- Remove fills
- Set opacity
- Set corner radius
- Set corner smoothing
- Set scale
- Set point count
- Paste properties
Layout
- Set position
- Set dimensions
- Set alignment
- Set rotation
- Set constraints
- Set auto layout
- Set auto layout resizing
- Remove auto layout
Strokes
Effects
Styles
- Find styles
- Get style by ID
- Create color style
- Create text style
- Create effect style
- Set color style
- Set text style
- Set effect style
Export
Prototyping
Events
Scripting
- Find layers
- For each
- If
- Else
- Repeat
- Set variable
- Ask for input
- Get node by ID
- Set property
- Log to console
- Show message
- Show alert
- Run script
- Delay
- Copy to clipboard
Shared plugin data
Thumbnail
Undo
Web
FigJam
Document
Window
Other
Variables
What are variables?
Use variables with actions to level up your automations.
Some actions come with their own variables that you can reference on itself and its nested actions.
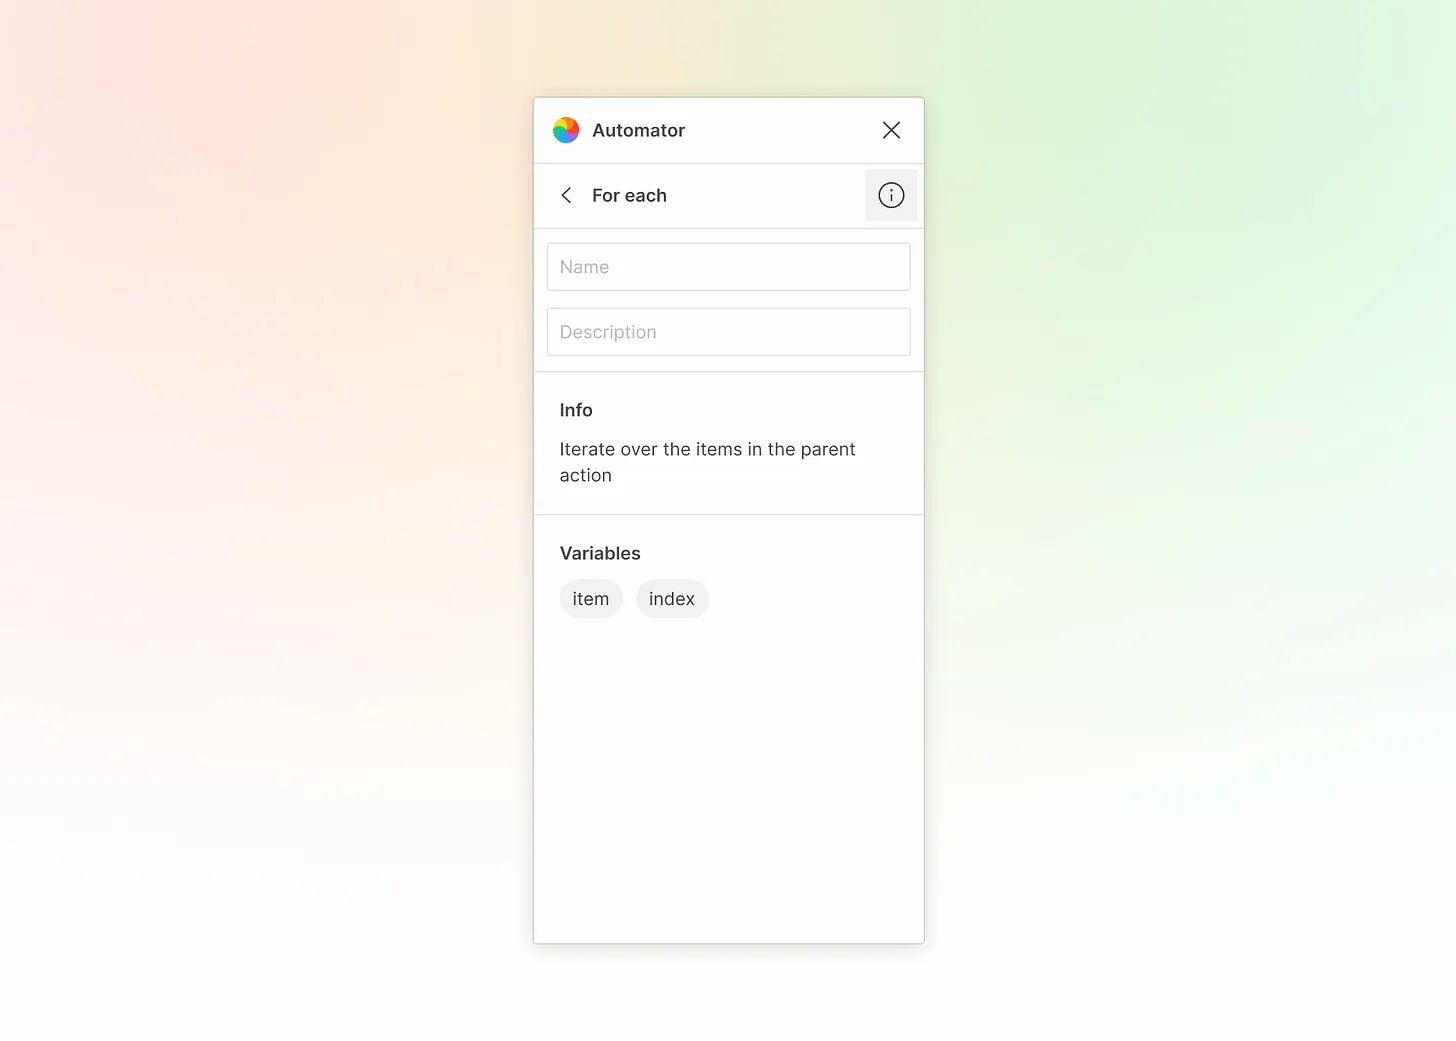
For example, the “For each” action exposes two variables:
item: the current item in the loop
index: the current index of the loop
Using a variable
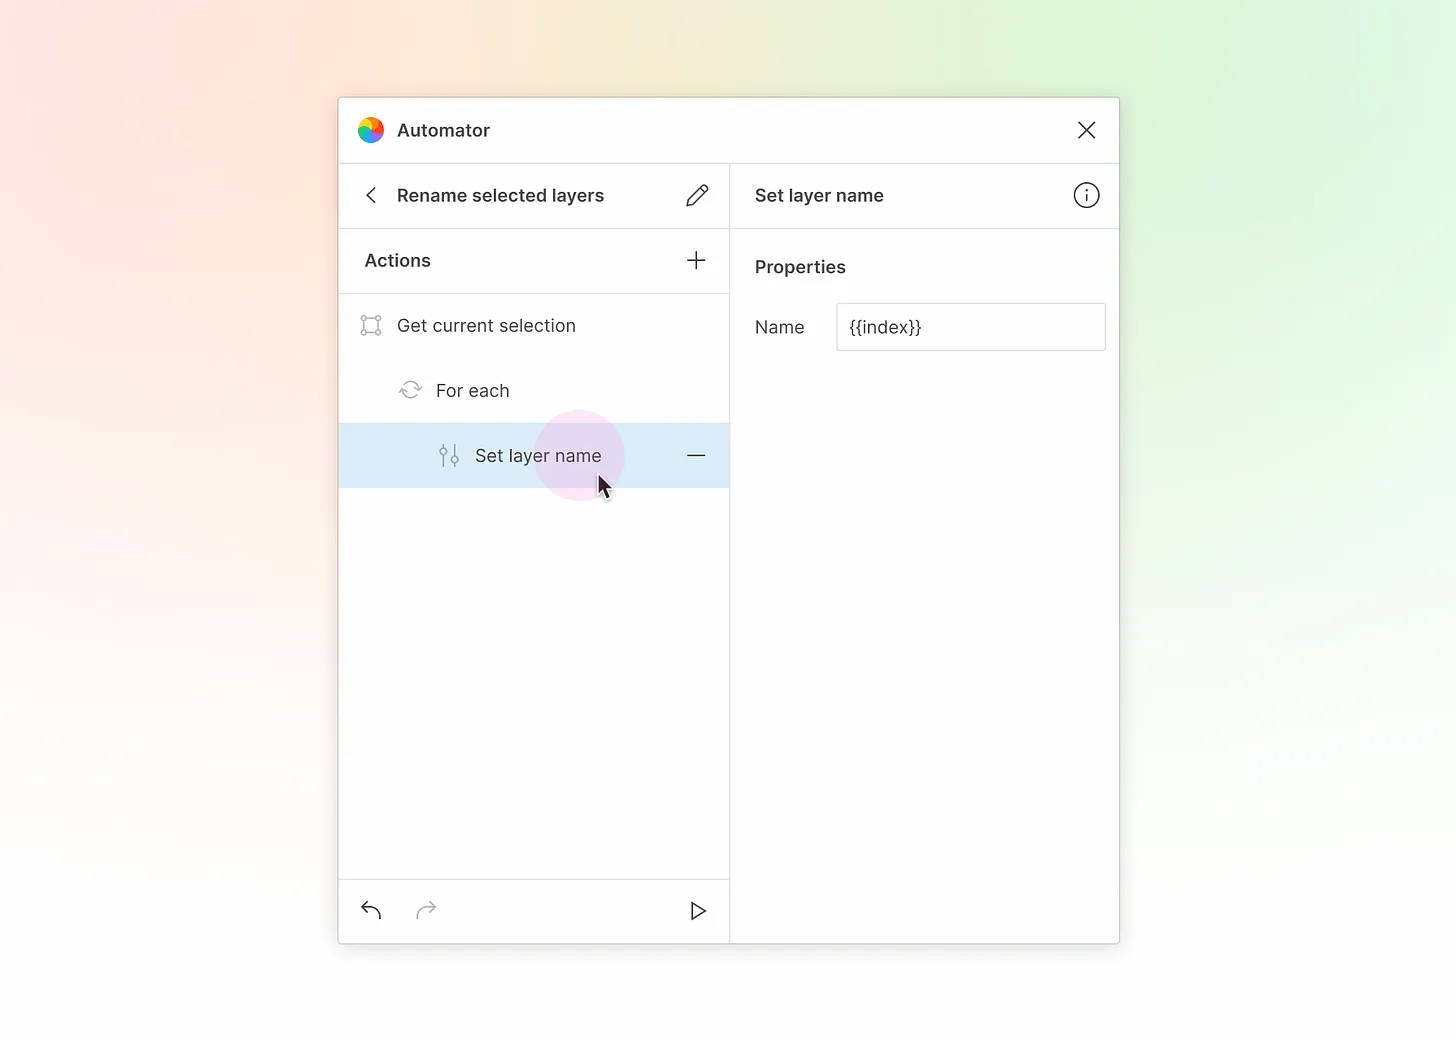
Recall that the “For each” action exposes two variables: “item” and “index”.
In the properties editor for “Set layer name”, we’re referencing the index variable from its parent “For each” action. Variables can be referenced by placing double nested curly brackets around the variable: {{index}}
Running this automation will rename all currently selected layers to the index of the loop.
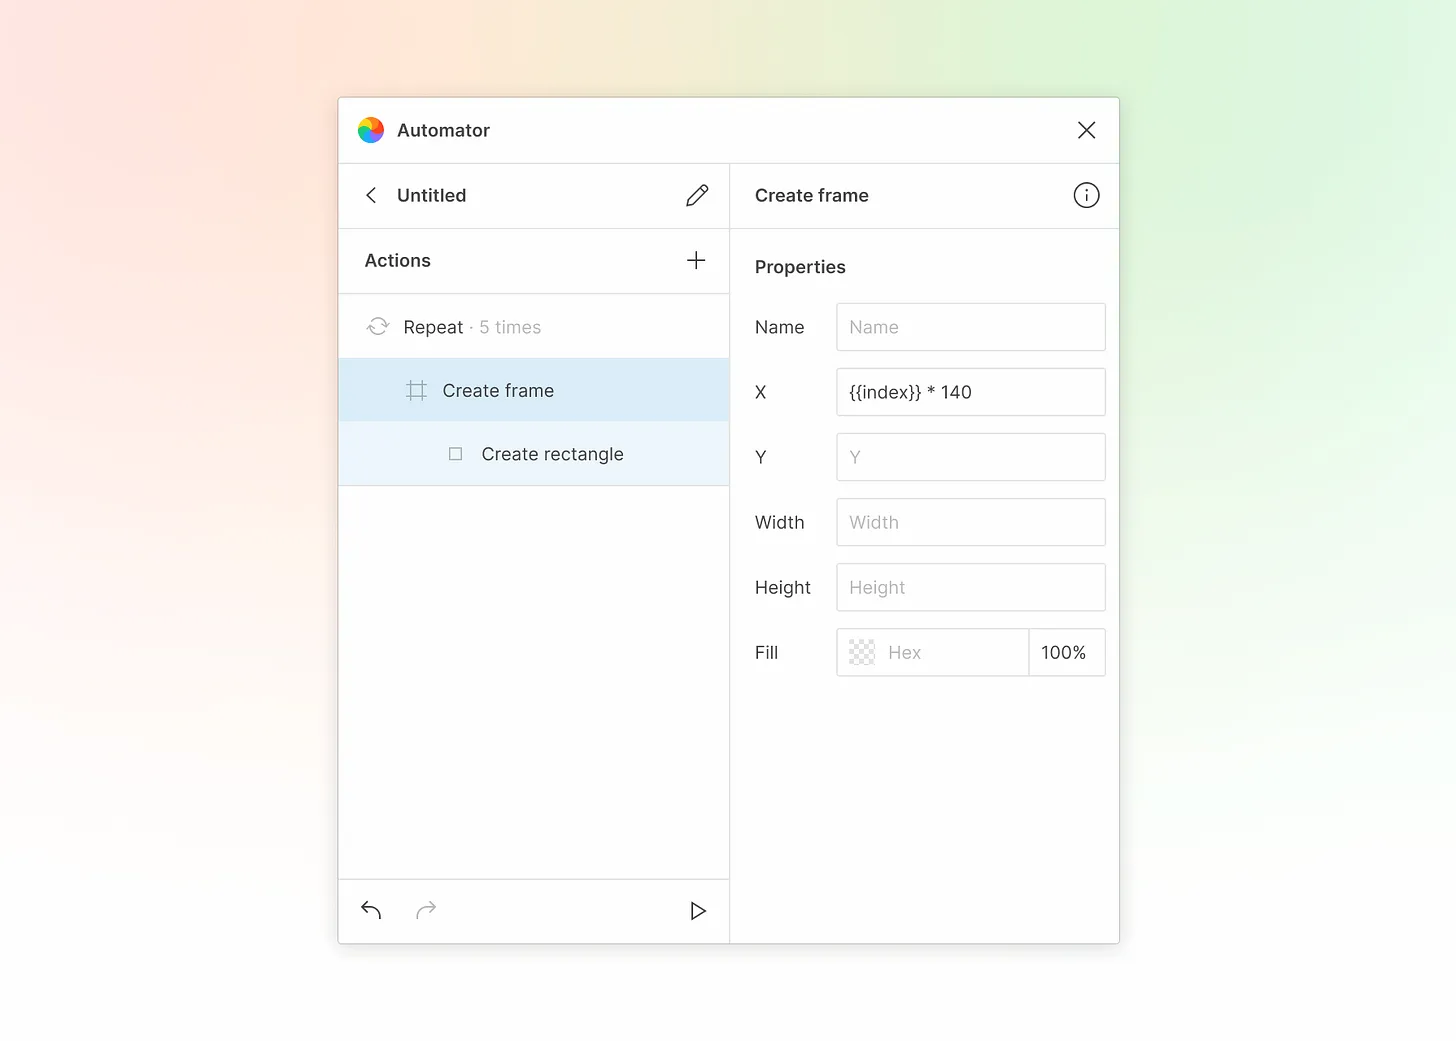
Recall the repeat action that repeats creating a frame with a rectangle inside of it 5 times.
You might’ve noticed that the 5 frames it created were all stacked on top of one another.
With variables, we can offset each frame using a little bit of math by setting the X property of “Create frame” to {{index}} \* 140
Custom variables
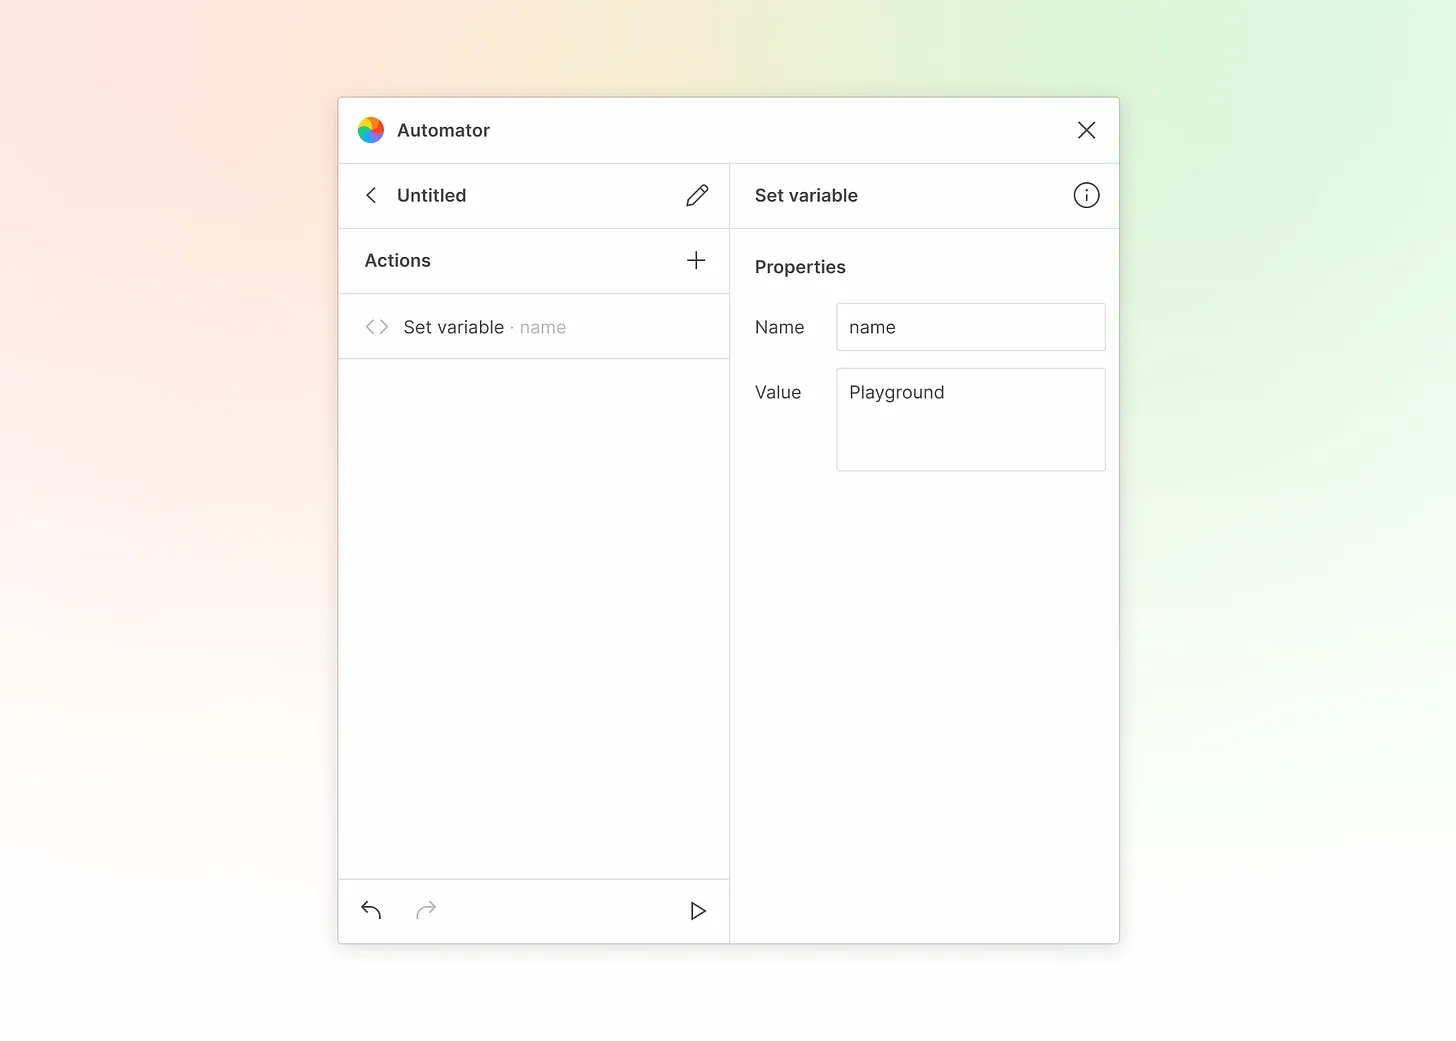
You can define a custom variable to be used in other actions by adding the “Set variable” action.
Define its name and assign it a value inside of its properties. Its value can even contain other variables.
In this example, you can use the name variable by referencing {{name}} in other actions.
Special variables
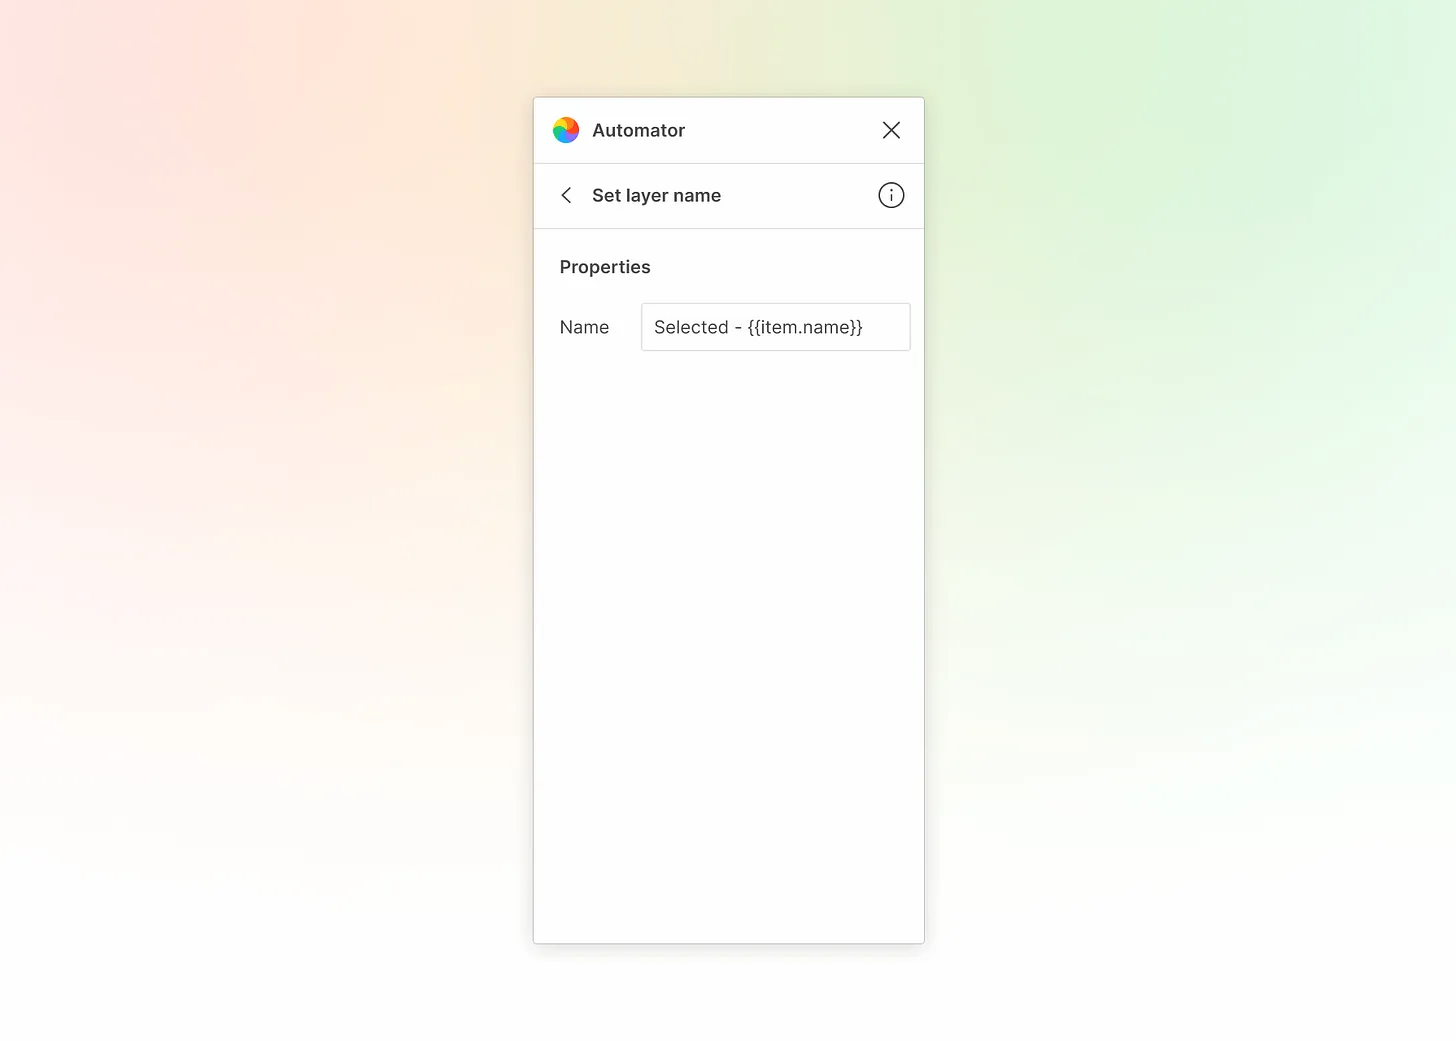
Some variables contain slightly more complex data, like item, this, and parent, amongst others.
You can use dot notation while referencing a variable to access its additional values.
In this example, we’re accessing the “name” property of the current item in the loop by using {{item.name}}
You can see which properties are available in special variables like item in the Figma Plugin API documentation.
Default variables

Automator provides a set of variables out of the box that are used either globally or in the context of certain actions.
You can find out more about the purpose and value of these variables by hovering over one in an automation’s settings or viewing additional action information.
indexthisresultautomationNamefileNamecurrentPageNameparentdatetimeitemcurrentUserviewport
Community
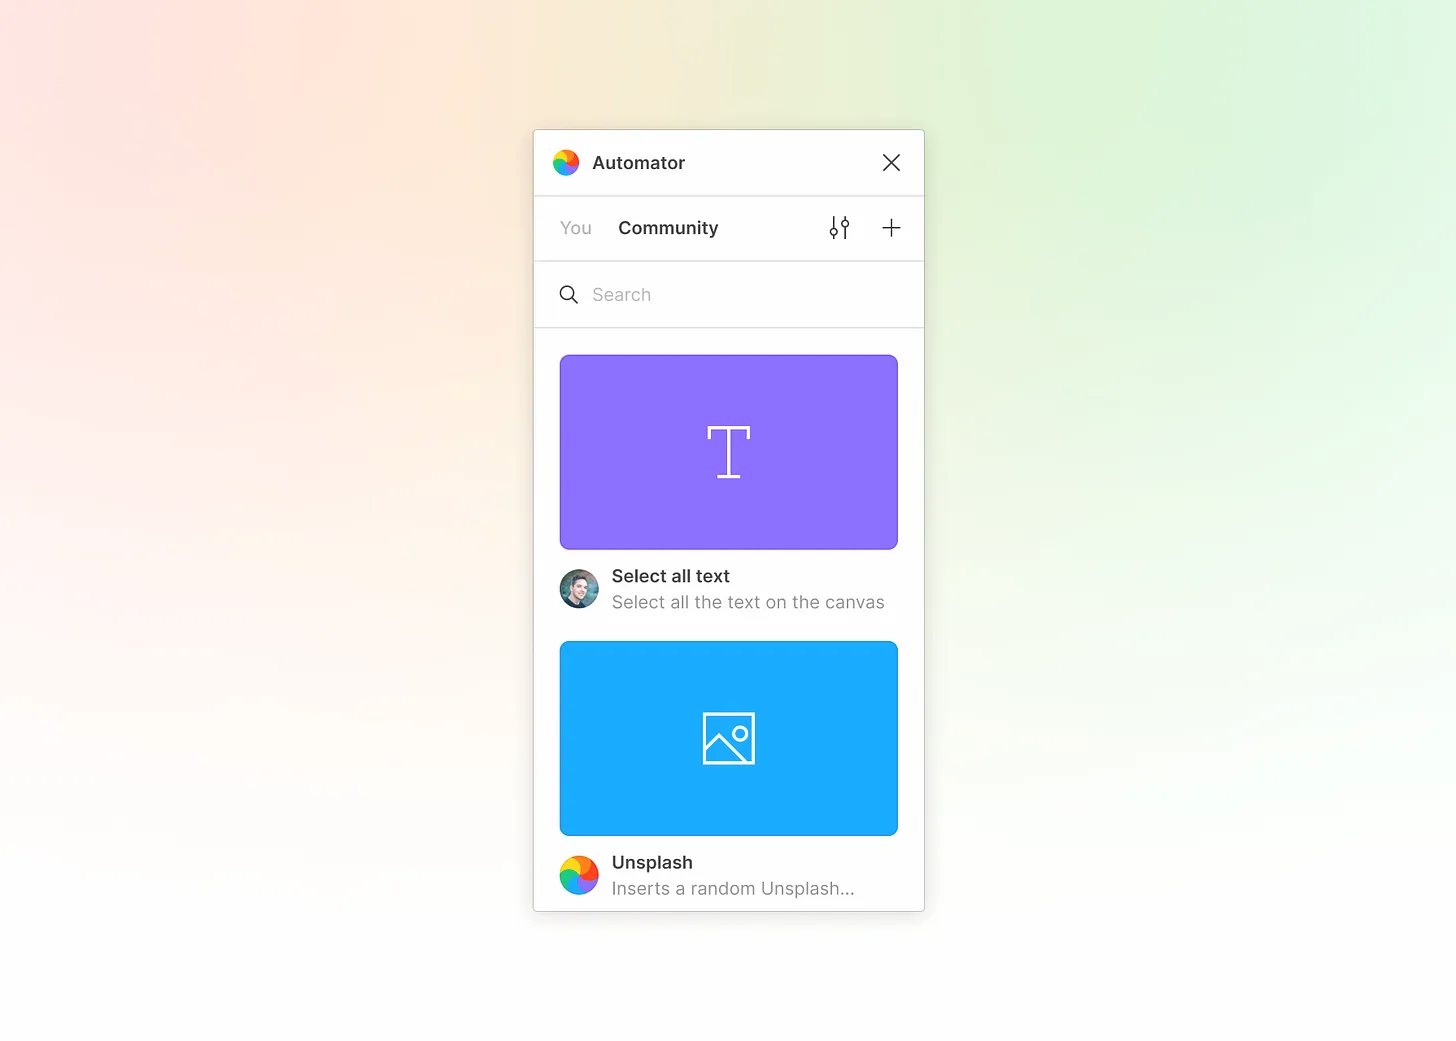
The Automator Community is where you can explore automations created by others and remix them to work for you.
Duplicate an automation to run it or remix it by hovering over an automation tile and pressing “Duplicate”.
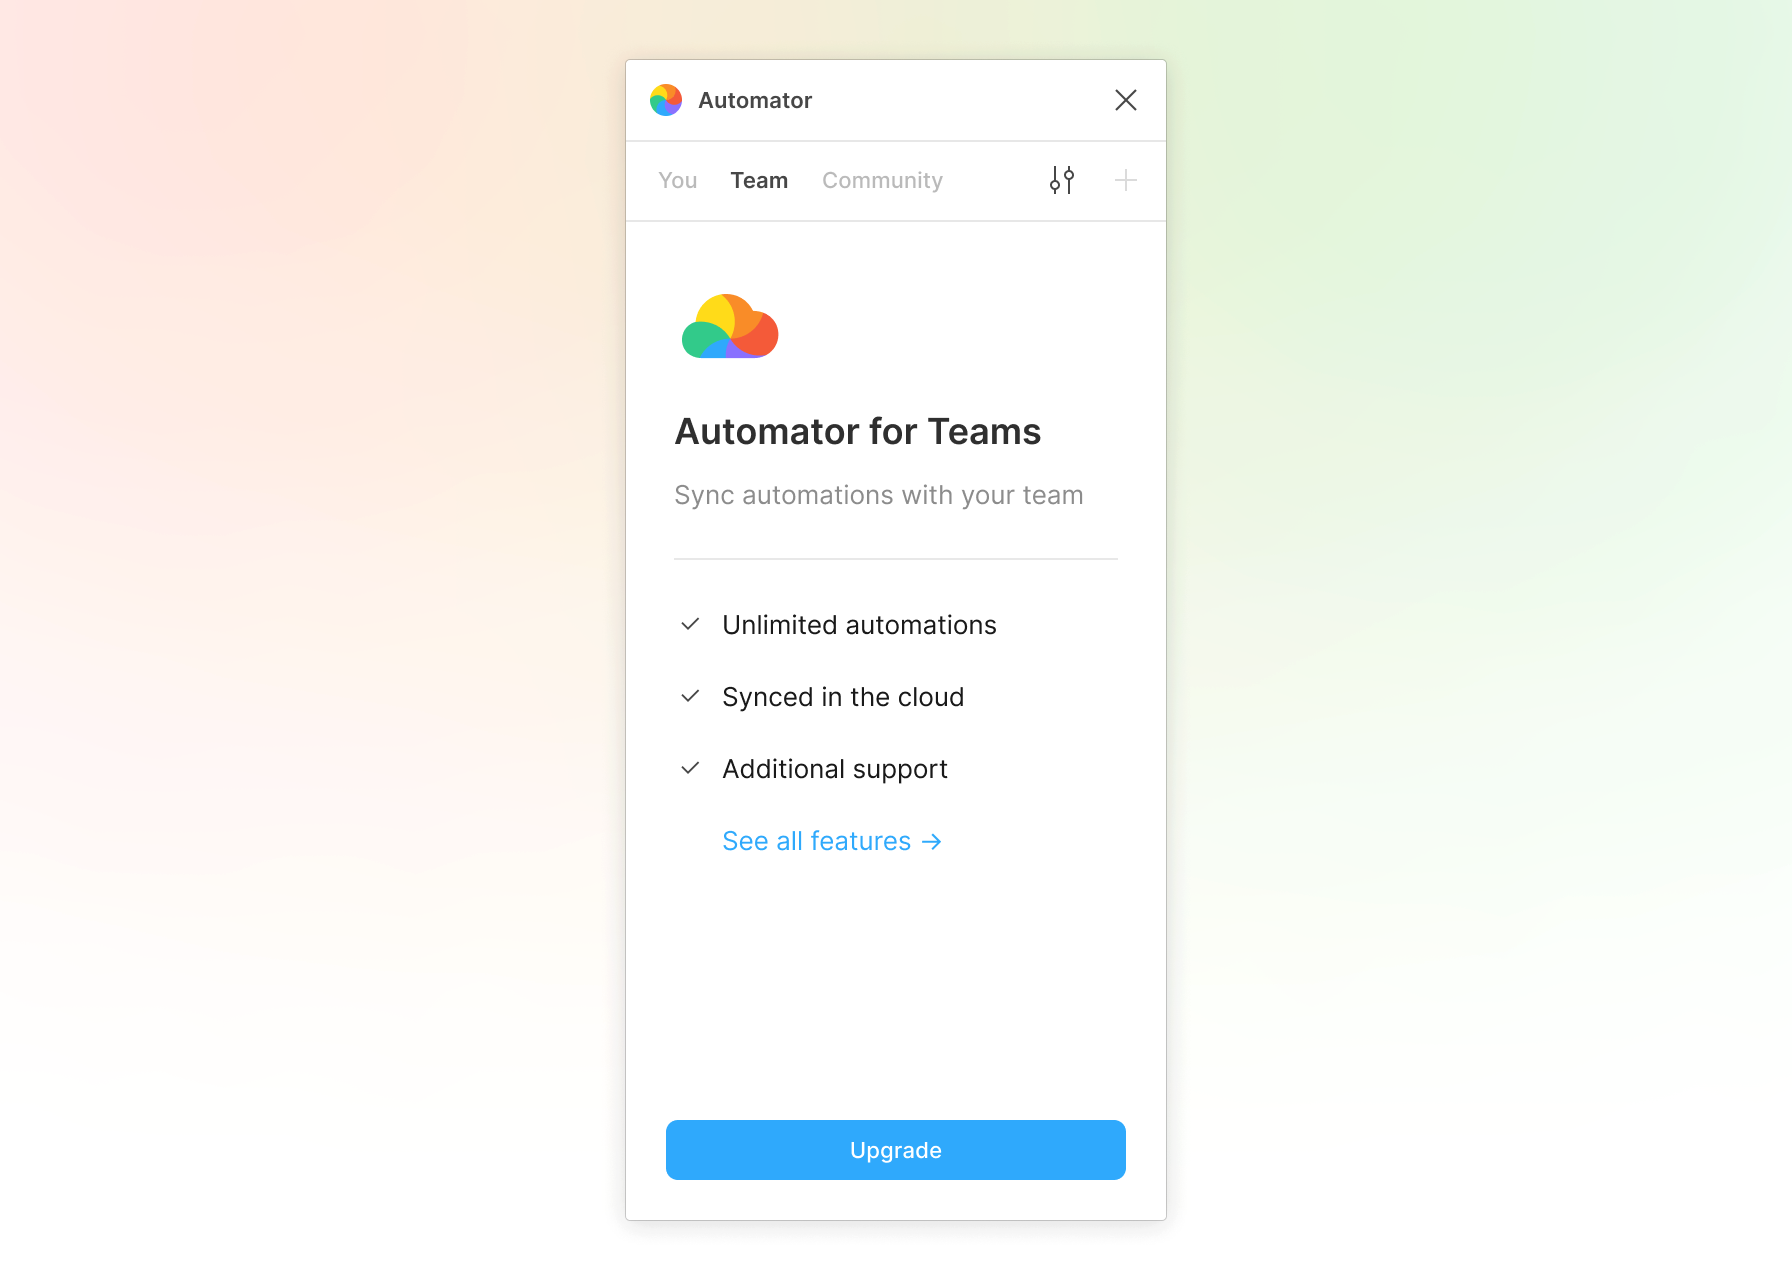
Teams
Automator for Teams lets your entire team sync shared automations in the cloud for everyone to use. Subscribe now at automator.design →
Syncing automations
Every change you make to your team automations need to be synced to the cloud before it can be used by others.
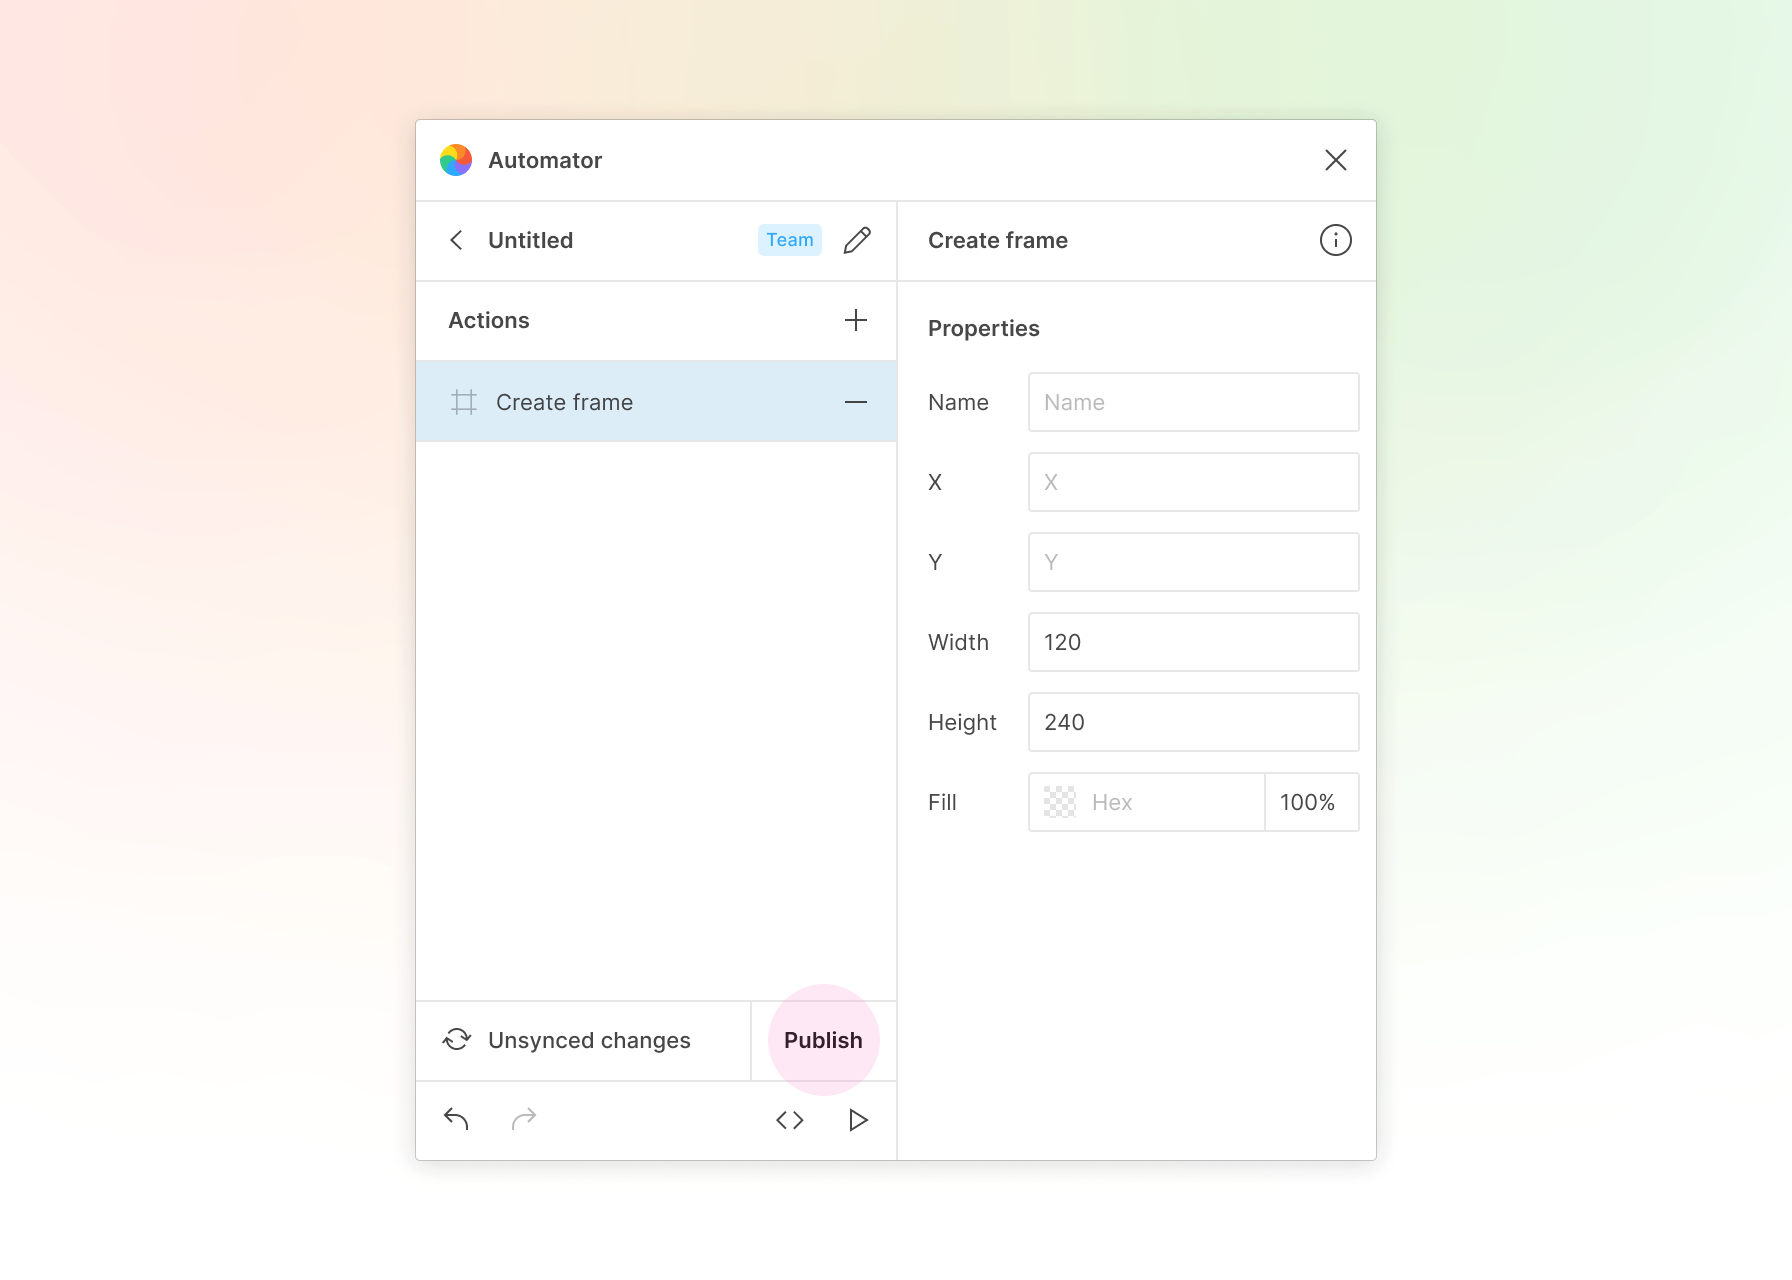 After making a change while editing a team automation, press the "Publish" button to sync your changes to the cloud.
 Once your changes are synced, you'll see a "Synced" badge. Your team members will be able to use your updated automation.
Support
Visit support.diagram.com to manage your license and billing.